Burp Scanner
An essential feature of web proxy tools is their web scanners. Burp Suite comes with Burp Scanner, a powerful scanner for various types of web vulnerabilities, using a Crawler for building the website structure, and Scanner for passive and active scanning.
Burp Scanner is a Pro-Only feature, and it is not available in the free Community version of Burp Suite. However, given the wide scope that Burp Scanner covers and the advanced features it includes, it makes it an enterprise-level tool, and as such, it is expected to be a paid feature.
Target Scope
To start a scan in Burp Suite, we have the following options:
- Start scan on a specific request from Proxy History
- Start a new scan on a set of targets
- Start a scan on items in scope
To start a scan on a specific request from Proxy History, we can right-click on it once we locate it in the history, and then select Scan to be able to configure the scan before we run it, or select Passive/Active Scan to quickly start a scan with the default configurations:

We may also click on the New Scan button on the Dashboard tab, which would open the New Scan configuration window to configure a scan on a set of custom targets.
- The
Target Scopecan be utilized with all Burp features to define a custom set of targets that will be processed. Burp also allows us to limit Burp to in-scope items to save resources by ignoring any out-of-scope URLs.
If we go to (Target>Site map), it will show a listing of all directories and files Burp has detected in various requests that went through its proxy:
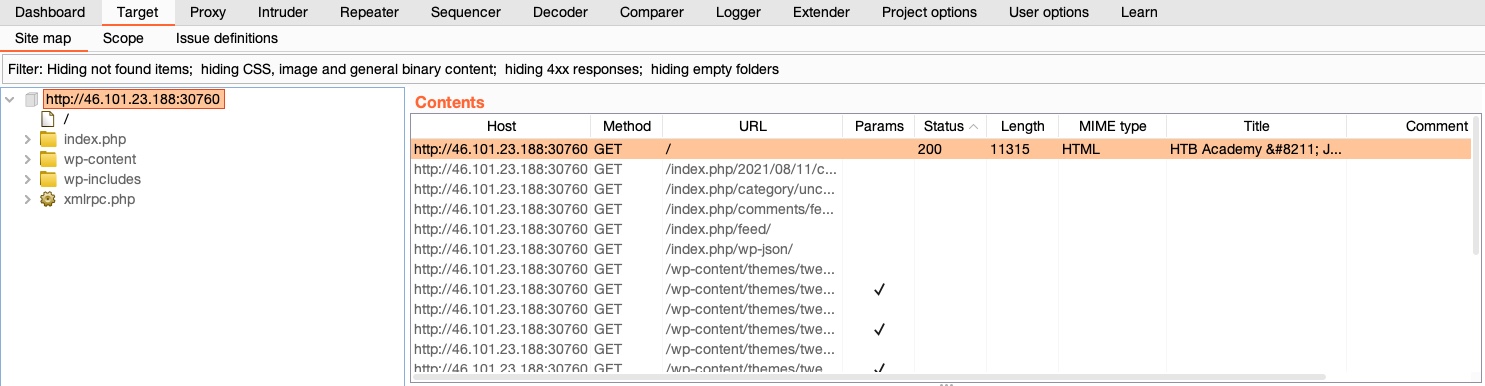
To add an item to our scope, we can right-click on it and select Add to scope:

Note: When you add the first item to your scope, Burp will give you the option to restrict its features to in-scope items only, and ignore any out-of-scope items.
We may also need to exclude a few items from scope if scanning them may be dangerous or may end our session 'like a logout function'.
- To exclude an item from our scope, we can right-click on any in-scope item and select
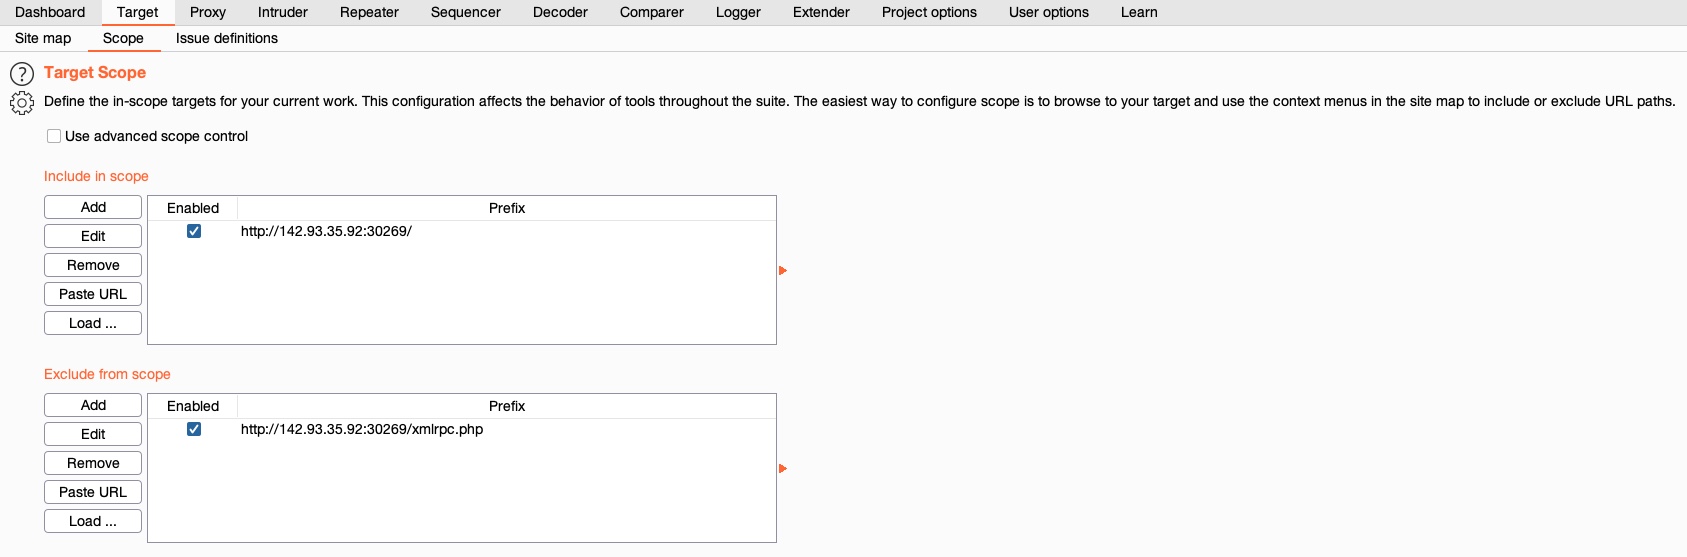
Remove from scope. - Finally, we can go to (
Target>Scope) to view the details of our scope. Here, we may also add/remove other items and use advanced scope control to specify regex patterns to be included/excluded.
Crawler
Once we have our scope ready, we can go to the Dashboard tab and click on New Scan to configure our scan, which would be automatically populated with our in-scope items:
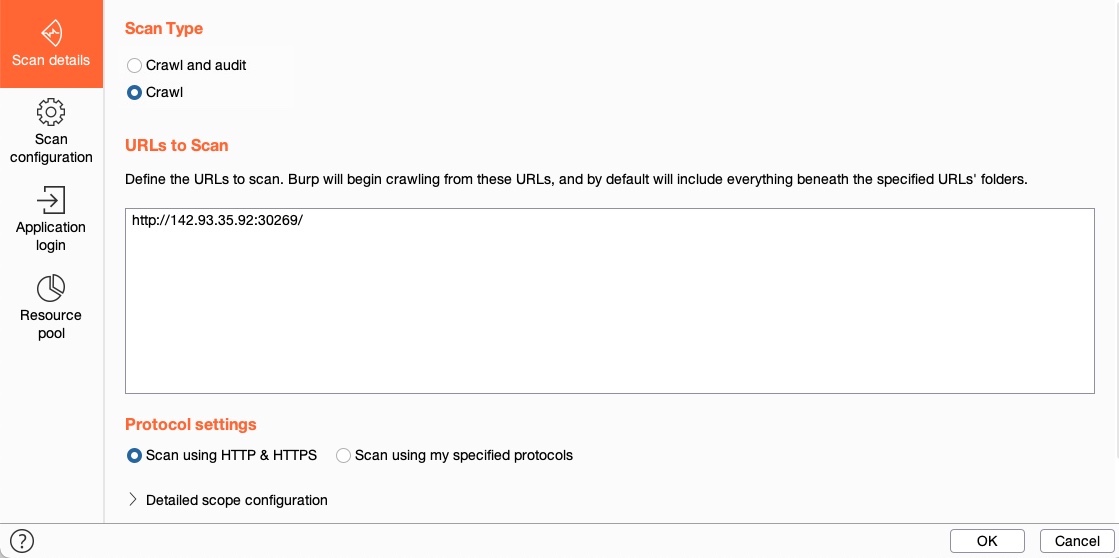
We see that Burp gives us two scanning options: Crawl and Audit and Crawl.
- A Web Crawler navigates a website by accessing any links found in its pages, accessing any forms, and examining any requests it makes to build a comprehensive map of the website.
- In the end, Burp Scanner presents us with a map of the target, showing all publicly accessible data in a single place.
- If we select
Crawl and Audit, Burp will run its scanner after its Crawler.
Note: A Crawl scan only follows and maps links found in the page we specified, and any pages found on it. It does not perform a fuzzing scan to identify pages that are never referenced, like what dirbuster or ffuf would do. This can be done with Burp Intruder or Content Discovery, and then added to scope, if needed.
Let us select Crawl as a start and go to the Scan configuration tab to configure our scan. From here, we may choose to click on New to build a custom configuration, which would allow us to set the configurations like the crawling speed or limit, whether Burp will attempt to log in to any login forms, and a few other configurations. For the sake of simplicity, we will click on the Select from library button, which gives us a few preset configurations we can pick from (or custom configurations we previously defined):
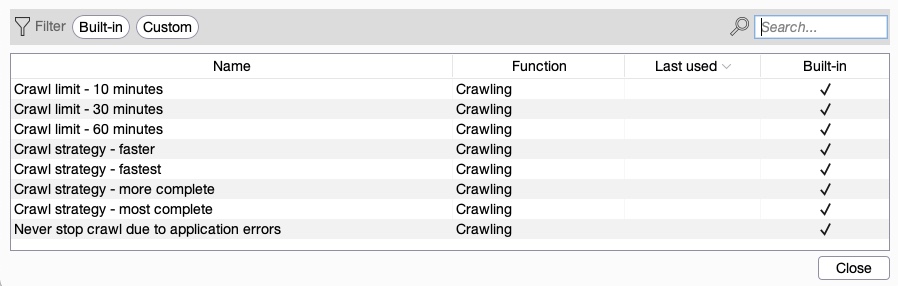
We will select the Crawl strategy - fastest option and continue to the Application login tab. In this tab, we can add a set of credentials for Burp to attempt in any Login forms/fields it can find. We may also record a set of steps by performing a manual login in the pre-configured browser, such that Burp knows what steps to follow to gain a login session. This can be essential if we were running our scan using an authenticated user, which would allow us to cover parts of the web application that Burp may otherwise not have access to. As we do not have any credentials, we'll leave it empty.
With that, we can click on the Ok button to start our Crawl scan. Once our scan starts, we can see its progress in the Dashboard tab under Tasks:

We may also click on the View details button on the tasks to see more details about the running scan or click on the gear icon to customize our scan configurations further. Finally, once our scan is complete, we'll see Crawl Finished in the task info, and then we can go back to (Target>Site map) to view the updated site map:

Passive Scanner
Now that the site map is fully built, we may select to scan this target for potential vulnerabilities. When we choose the Crawl and Audit option in the New Scan dialog, Burp will perform two types of scans: A Passive Vulnerability Scan and an Active Vulnerability Scan.
Passive vs. Active Vulnerability Scan
- Unlike an Active Scan, a Passive Scan does not send any new requests but analyzes the source of pages already visited in the target/scope and then tries to identify
potentialvulnerabilities. - This is very useful for a quick analysis of a specific target, like missing HTML tags or potential DOM-based XSS vulnerabilities.
- However, without sending any requests to test and verify these vulnerabilities, a Passive Scan can only suggest a list of potential vulnerabilities. Still, Burp Passive Scanner does provide a level of
Confidencefor each identified vulnerability, which is also helpful for prioritizing potential vulnerabilities.
Pasive Scan Demo
-
Let's start by trying to perform a Passive Scan only. To do so, we can once again select the target in (
Target>Site map) or a request in Burp Proxy History, then right-click on it and selectDo passive scanorPassively scan this target. -
The Passive Scan will start running, and its task can be seen in the
Dashboardtab as well. Once the scan finishes, we can click onView Detailsto review identified vulnerabilities and then select theIssue activitytab:
-
Alternately, we can view all identified issues in the
Issue activitypane on theDashboardtab.- As we can see, it shows the list of potential vulnerabilities, their severity, and their confidence.
- Usually, we want to look for vulnerabilities with
Highseverity andCertainconfidence. However, we should include all levels of severity and confidence for very sensitive web applications, with a special focus onHighseverity andConfident/Firmconfidence.
Active Scanner
We finally reach the most powerful part of Burp Scanner, which is its Active Vulnerability Scanner. An active scan runs a more comprehensive scan than a Passive Scan, as follows:
- It starts by running a Crawl and a web fuzzer (like dirbuster/ffuf) to identify all possible pages
- It runs a Passive Scan on all identified pages
- It checks each of the identified vulnerabilities from the Passive Scan and sends requests to verify them
- It performs a JavaScript analysis to identify further potential vulnerabilities
- It fuzzes various identified insertion points and parameters to look for common vulnerabilities like XSS, Command Injection, SQL Injection, and other common web vulnerabilities
The Burp Active scanner is considered one of the best tools in that field and is frequently updated to scan for newly identified web vulnerabilities by the Burp research team.
Active Scanner Demo
- We can start an Active Scan similarly to how we began a Passive Scan by selecting the
Do active scanfrom the right-click menu on a request in Burp Proxy History.- Alternatively, we can run a scan on our scope with the
New Scanbutton in theDashboardtab, which would allow us to configure our active scan
- Alternatively, we can run a scan on our scope with the
- This time, we will select the
Crawl and Auditoption, which will perform all of the above points. - We may also set the Crawl configurations and the Audit configurations.
- The Audit configurations enable us to select what type of vulnerabilities we want to scan (defaults to all), where the scanner would attempt to insert its payloads, in addition to many other useful configurations.
- Once again, we can select a configuration preset with the
Select from librarybutton.- For our test, as we are interested in
Highvulnerabilities that may allow us to gain control over the backend server, we will select theAudit checks - critical issues onlyoption.
- For our test, as we are interested in
- Finally, we may add login details, as we previously saw with the Crawl configurations.
Once we select our configurations, we can click on the Ok button to start the scan, and the active scan task should be added in the Tasks pane in the Dashboard tab:

- The scan will run all of the steps mentioned above, which is why it will take significantly longer to finish than our earlier scans depending on the configurations we selected.
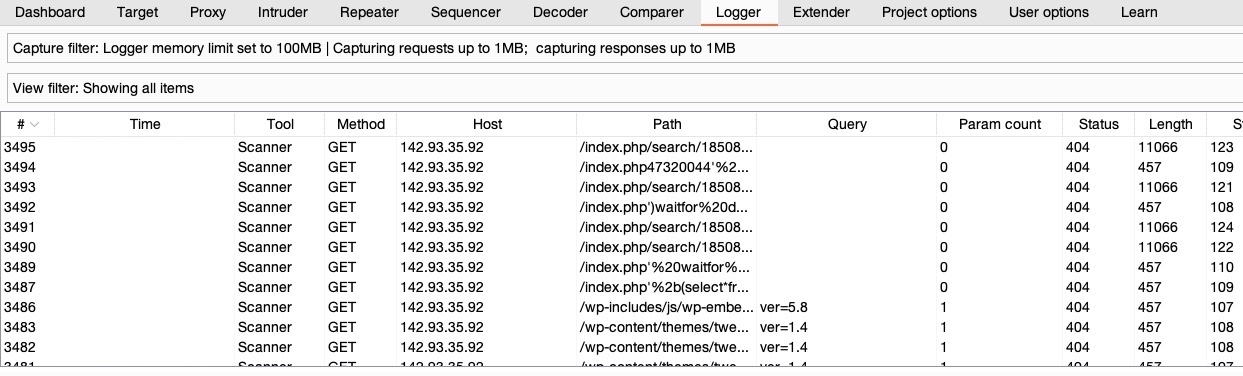
- As the scan is running, we can view the various requests it is making by clicking on the
View detailsbutton and selecting theLoggertab, or by going to theLoggertab in Burp, which shows all requests that went through or were made by Burp:
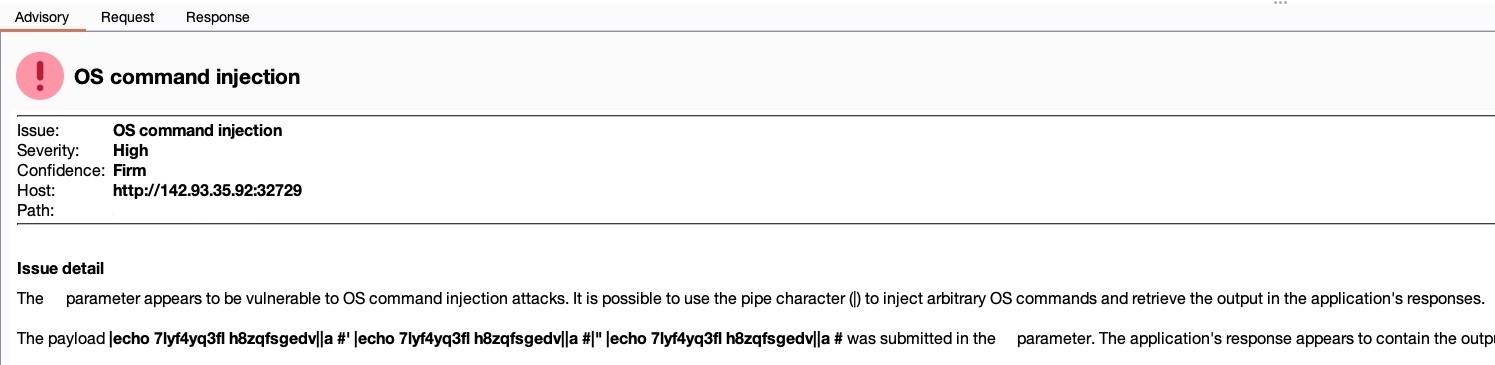
Once the scan is done, we can look at the Issue activity pane in the Dashboard tab to view and filter all of the issues identified so far. From the filter above the results, let's select High and Certain and see our filtered results:

We see that Burp identified an OS command injection vulnerability, which is ranked with a High severity and Firm confidence. As Burp is firmly confident that this severe vulnerability exists, we can read about it by clicking on it and reading the advisory shown, and view the sent request and received response, to be able to know whether the vulnerability can be exploited or how it poses a threat to the web server:
Reporting
- Finally, once all of our scans are completed, and all potential issues have been identified, we can go to (
Target>Site map), right-click on our target, and select (Issue>Report issues for this host). - We will get prompted to select the export type for the report and what information we would like to include in the report.
- Once we export the report, we can open it in any web browser to view its details:
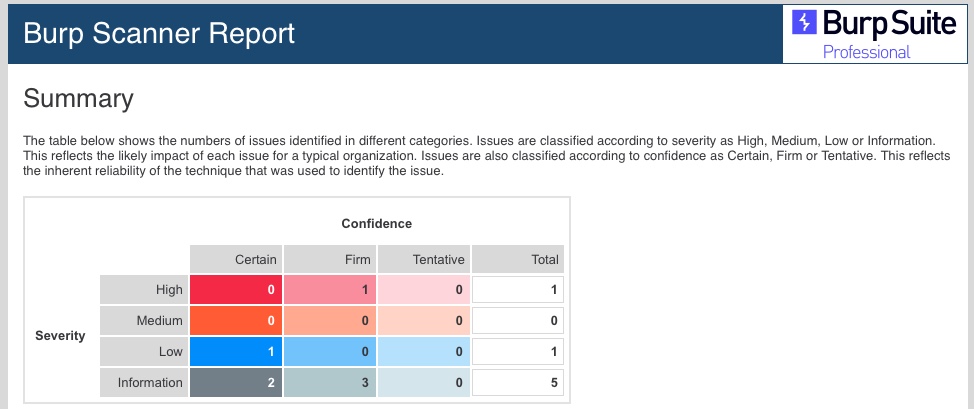
- As we can see, Burp's report is very organized and can be customized to only include select issues by severity/confidence. It also shows proof-of-concept details of how to exploit the vulnerability and information on how to remediate it.
- These reports may be used as supplementary data for the detailed reports that we prepare for our clients or the web application developers when performing a web penetration test or can be stored for our future reference.
- We should never merely export a report from any penetration tool and submit it to a client as the final deliverable.
- Instead, the reports and data generated by tools can be helpful as appendix data for clients who may need the raw scan data for remediation efforts or to import into a tracking dashboard.