Intercepting Web Requests
Intercepting Requests
Burp
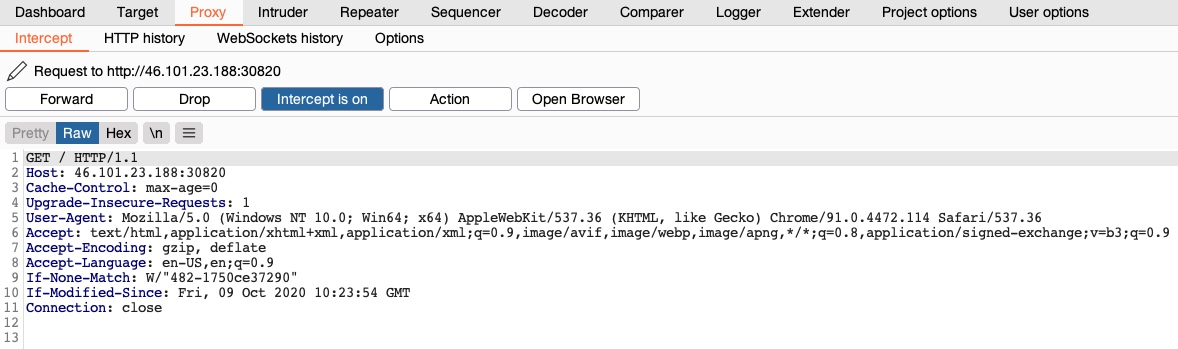
In Burp, we can navigate to the Proxy tab, and request interception should be on by default. If we want to turn request interception on or off, we may go to the Intercept sub-tab and click on Intercept is on/off button to do so:

Once we turn request interception on, we can start up the pre-configured browser and then visit our target website after spawning it from the exercise at the end of this section. Then, once we go back to Burp, we will see the intercepted request awaiting our action, and we can click on forward to forward the request:
Note: as all Firefox traffic will be intercepted in this case, we may see another request has been intercepted before this one. If this happens, click 'Forward', until we get the request to our target IP, as shown above.
ZAP
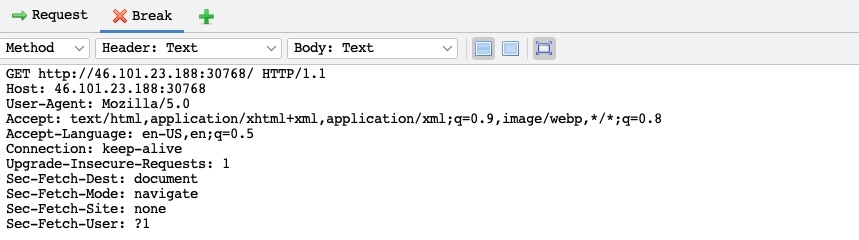
In ZAP, interception is off by default, as shown by the green button on the top bar (green indicates that requests can pass and not be intercepted). We can click on this button to turn the Request Interception on or off, or we can use the shortcut [CTRL+B] to toggle it on or off:

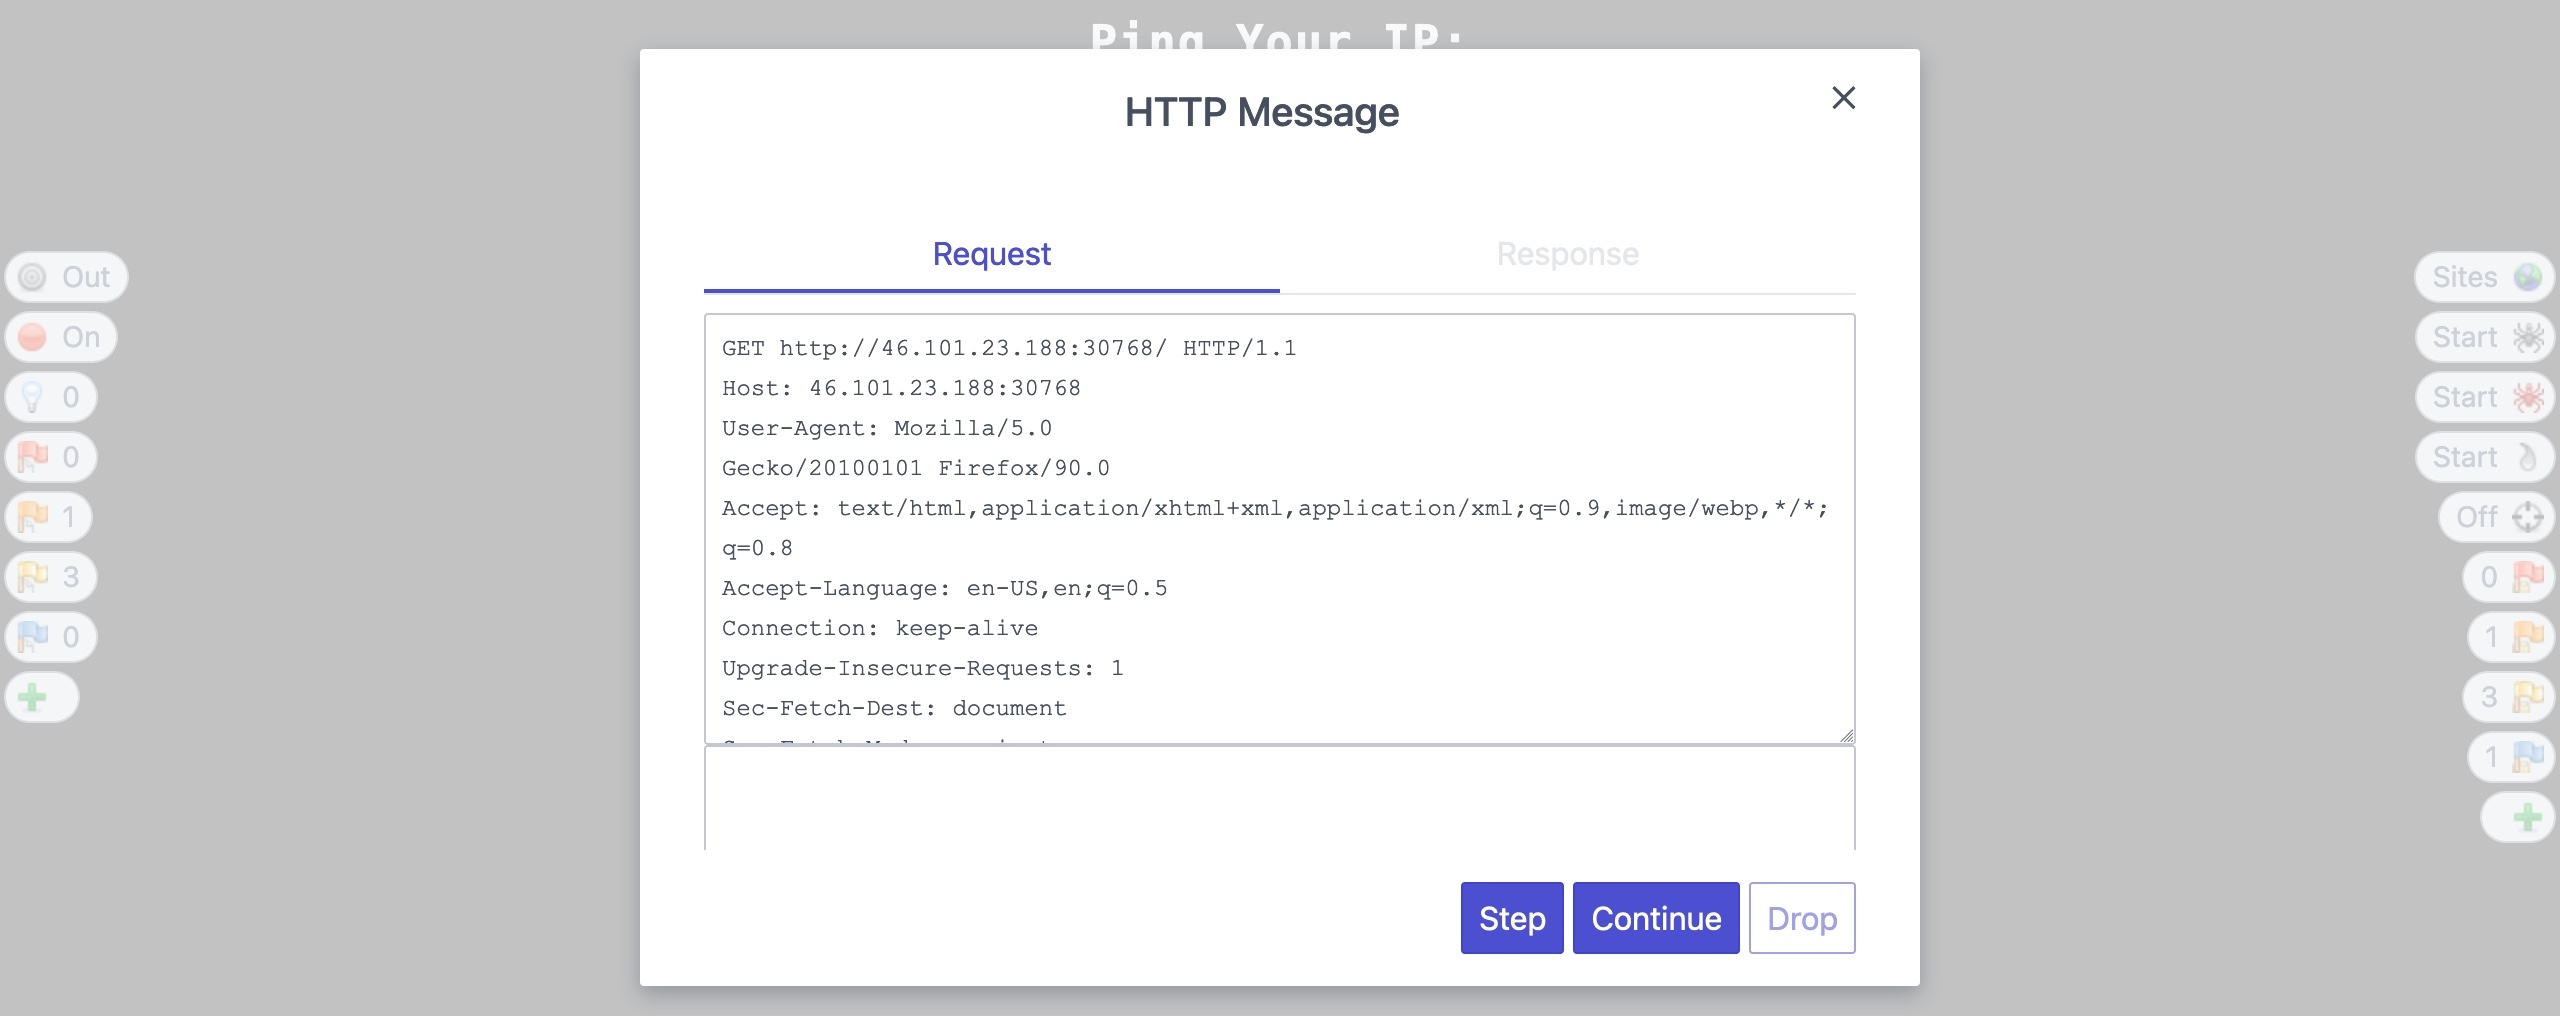
Then, we can start the pre-configured browser and revisit the exercise webpage. We will see the intercepted request in the top-right pane, and we can click on the step (right to the red break button) to forward the request:
ZAP also has a powerful feature called Heads Up Display (HUD), which allows us to control most of the main ZAP features from right within the pre-configured browser. We can enable the HUD by clicking its button at the end of the top menu bar:

The HUD has many features. For intercepting requests, we can click on the second button from the top on the left pane to turn request interception on:
Now, once we refresh the page or send another request, the HUD will intercept the request and will present it to us for action:
We can choose to step to send the request and examine its response and break any further requests, or we can choose to continue and let the page send the remaining requests. The step button is helpful when we want to examine every step of the page's functionality, while continue is useful when we are only interested in a single request and can forward the remaining requests once we reach our target request.
Manipulating Intercepted Requests
Once we intercept the request, it will remain hanging until we forward it, as we did above. We can examine the request, manipulate it to make any changes we want, and then send it to its destination. This helps us better understand what information a particular web application is sending in its web requests and how it may respond to any changes we make in that request.
There are numerous applications for this in Web Penetration Testing, such as testing for:
- SQL injections
- Command injections
- Upload bypass
- Authentication bypass
- XSS
- XXE
- Error handling
- Deserialization
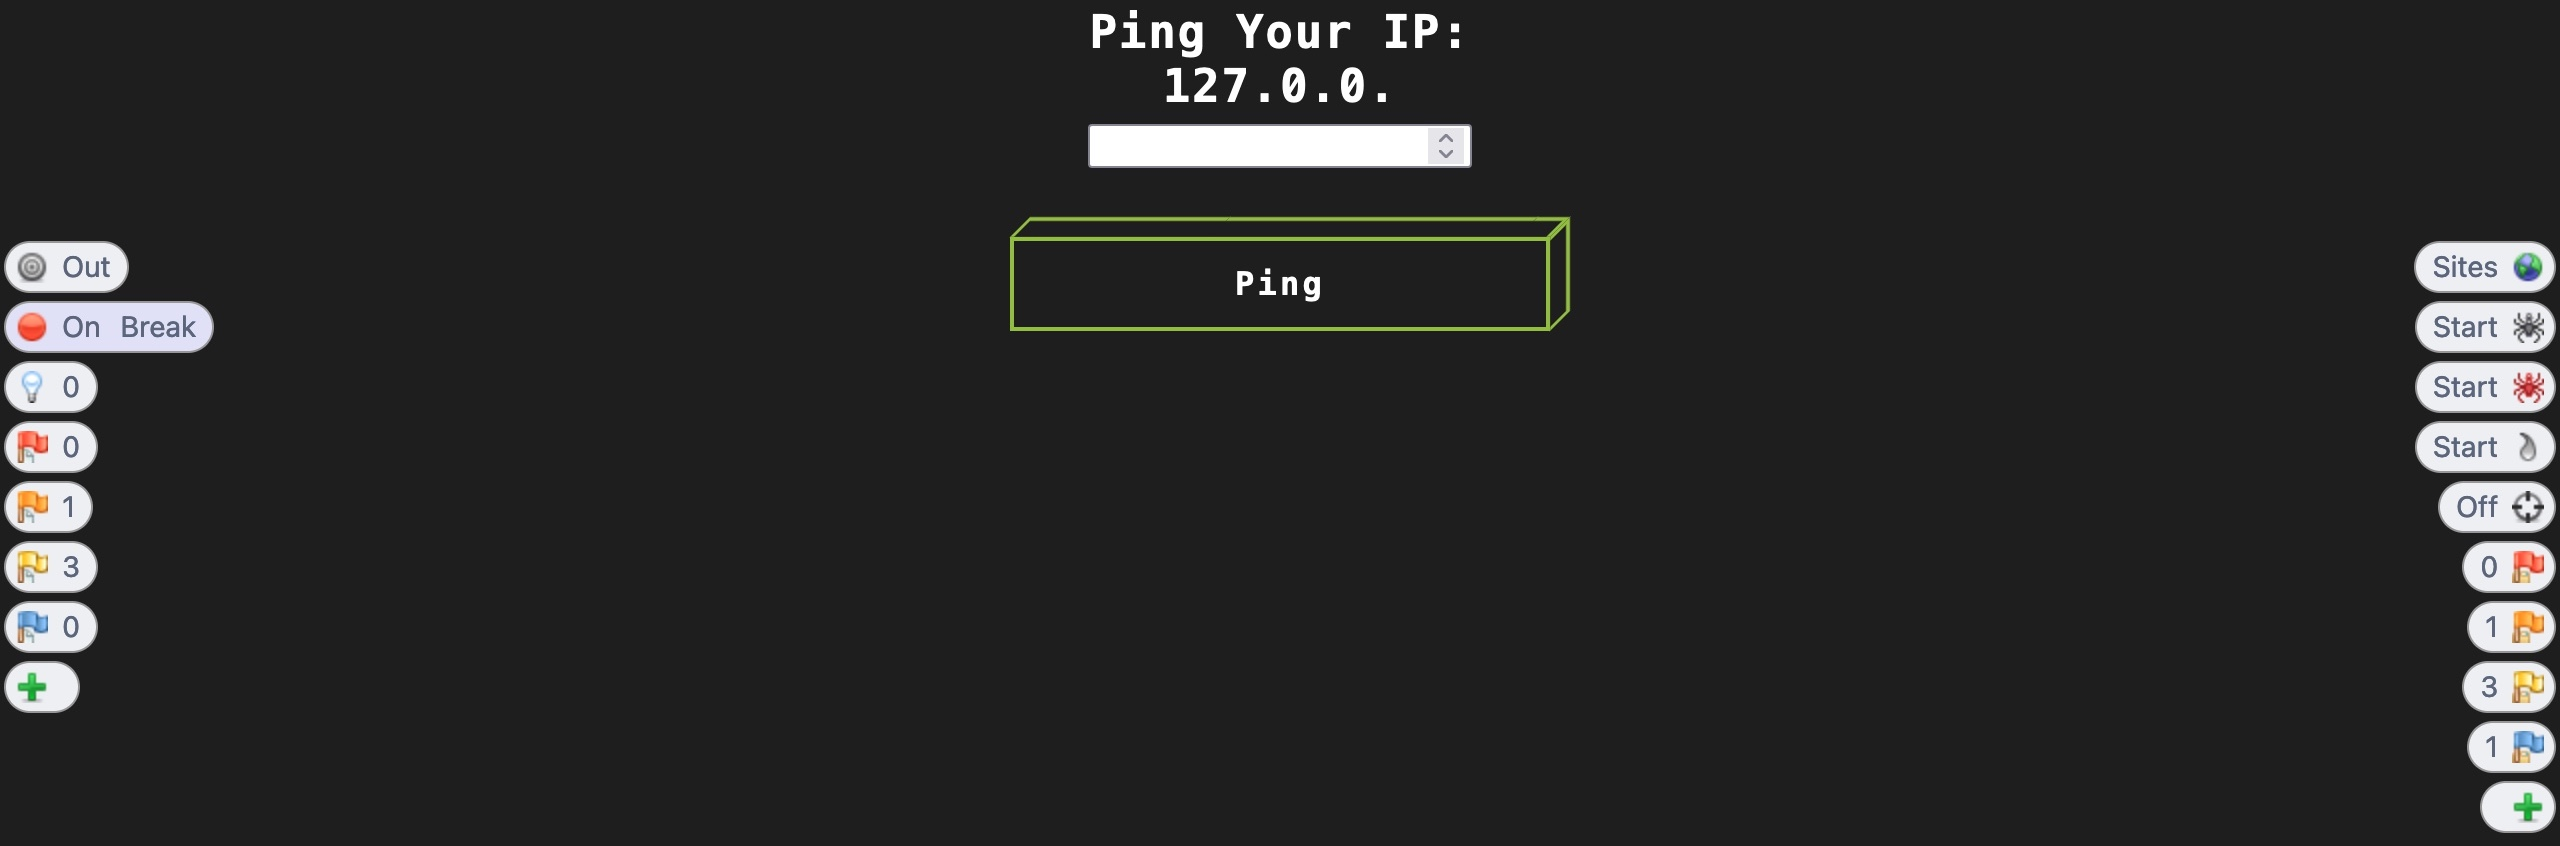
Let us turn request interception back on in the tool of our choosing, set the IP value on the page, then click on the Ping button. Once our request is intercepted, we should get a similar HTTP request to the following :
POST /ping HTTP/1.1
Host: 46.101.23.188:30820
Content-Length: 4
Cache-Control: max-age=0
Upgrade-Insecure-Requests: 1
Origin: http://46.101.23.188:30820
Content-Type: application/x-www-form-urlencoded
User-Agent: Mozilla/5.0 (Windows NT 10.0; Win64; x64) AppleWebKit/537.36 (KHTML, like Gecko) Chrome/91.0.4472.114 Safari/537.36
Accept: text/html,application/xhtml+xml,application/xml;q=0.9,image/avif,image/webp,image/apng,*/*;q=0.8,application/signed-exchange;v=b3;q=0.9
Referer: http://46.101.23.188:30820/
Accept-Encoding: gzip, deflate
Accept-Language: en-US,en;q=0.9
Connection: close

ip=1
Typically, we can only specify numbers in the IP field using the browser, as the web page prevents us from sending any non-numeric characters using front-end JavaScript. However, with the power of intercepting and manipulating HTTP requests, we can try using other characters to "break" the application ("breaking" the request/response flow by manipulating the target parameter, not damaging the target web application). If the web application does not verify and validate the HTTP requests on the back-end, we may be able to manipulate it and exploit it.
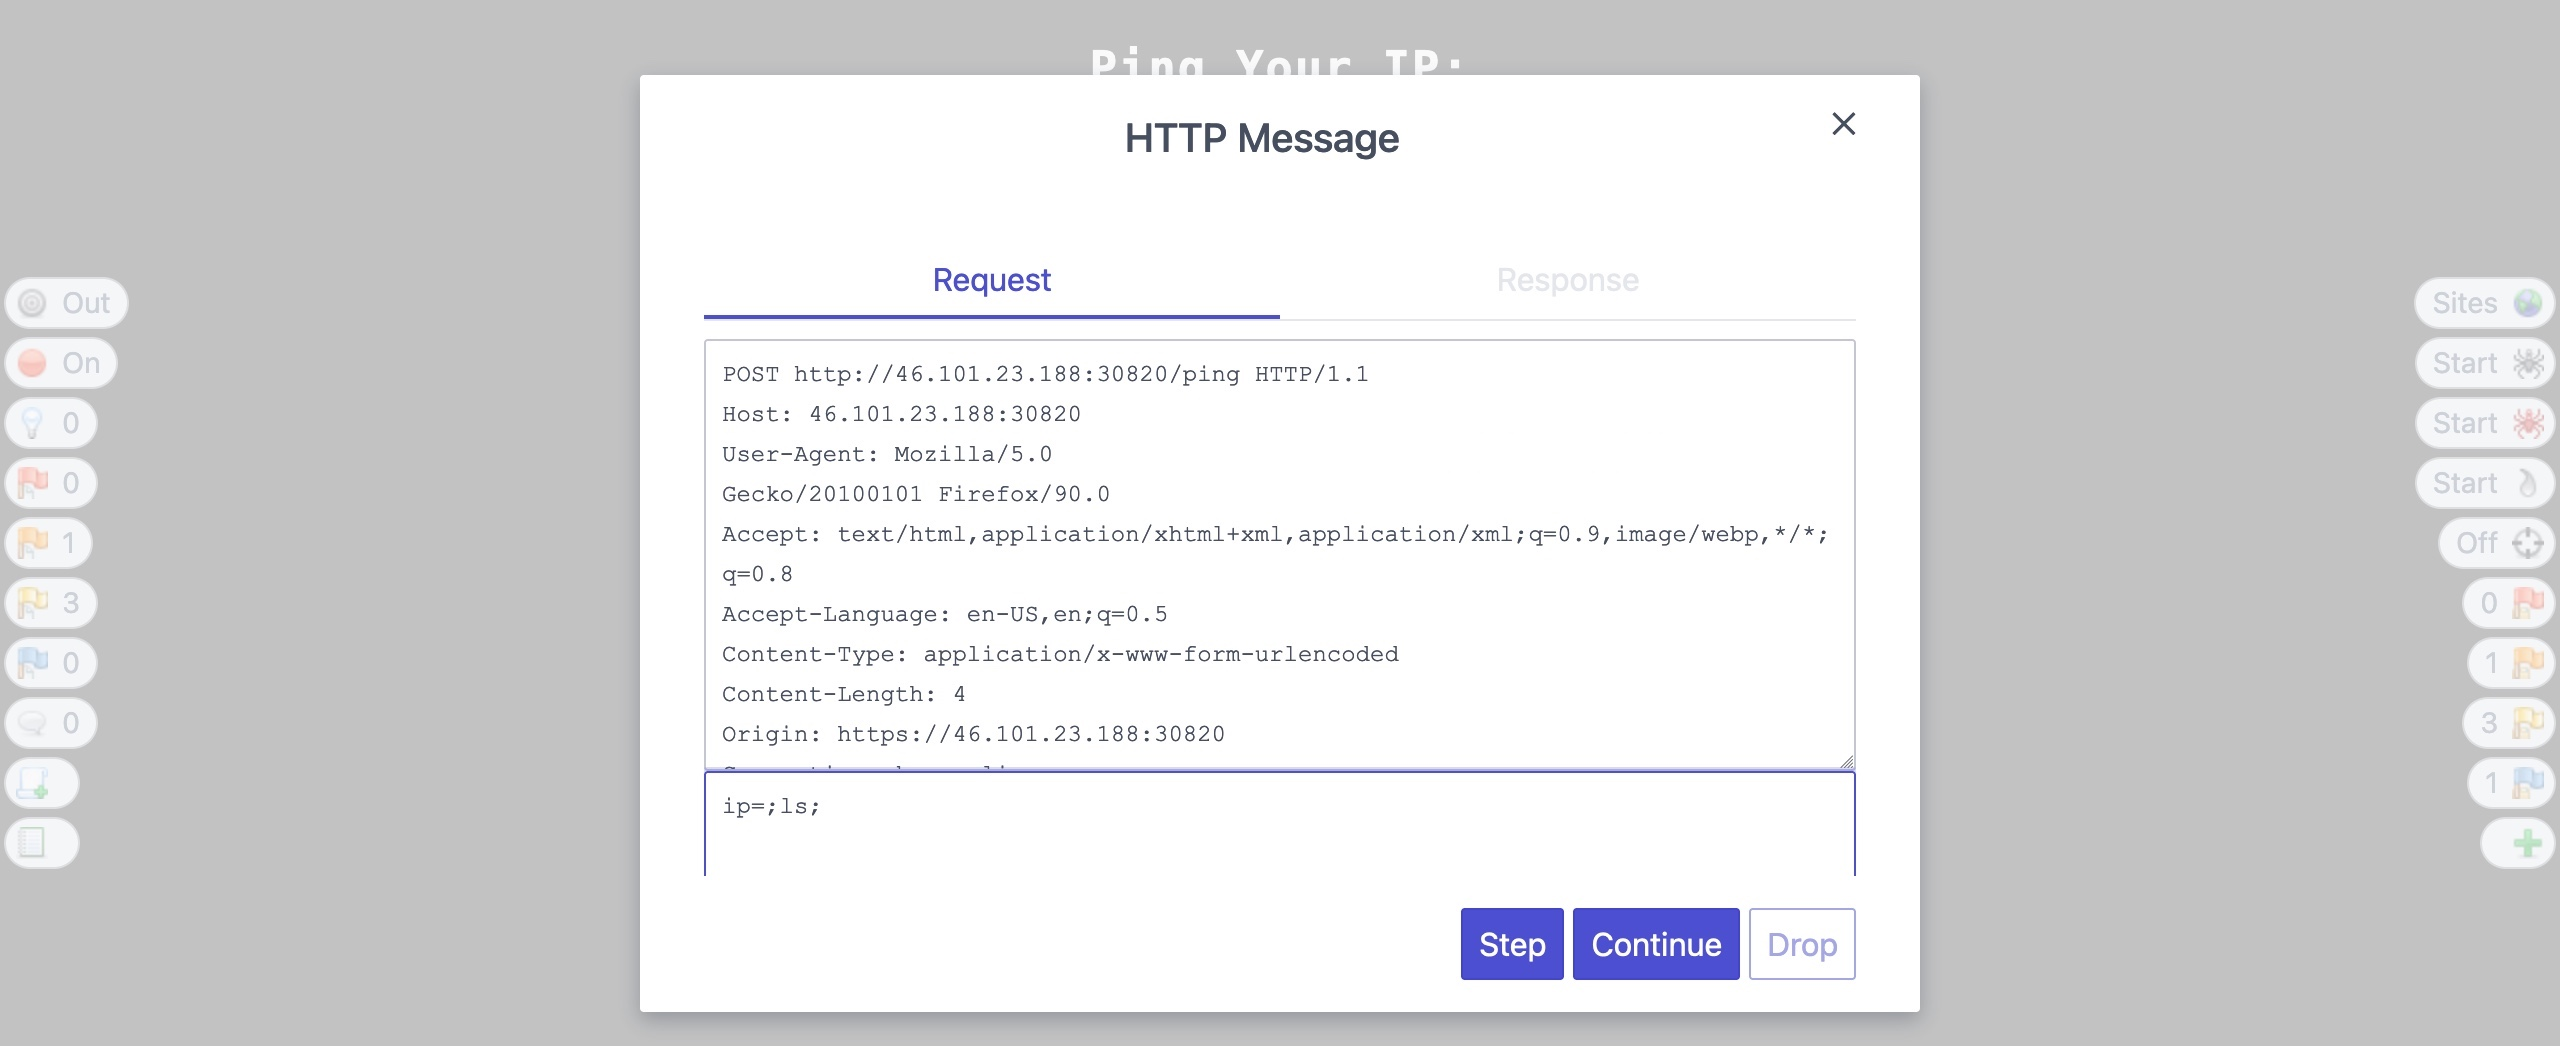
So, let us change the ip parameter's value from 1 to ;ls; and see how the web application handles our input:
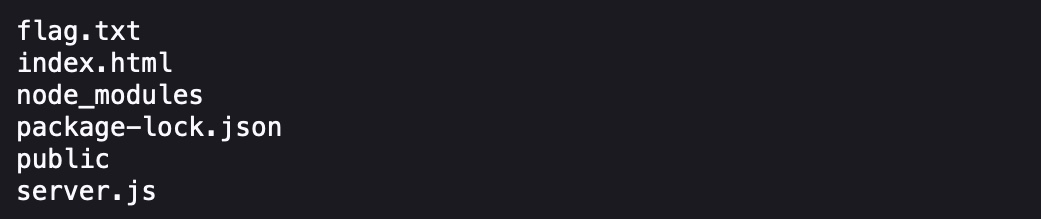
Once we click continue/forward, we will see that the response changed from the default ping output to the ls output, meaning that we successfully manipulated the request to inject our command:
This demonstrates a basic example of how request interception and manipulation can help with testing web applications for various vulnerabilities, which is considered an essential tool to be able to test different web applications effectively.
Exercise
Try intercepting the ping request on the server shown above, and change the post data similarly to what we did in this section. Change the command to read 'flag.txt'
Intercept the POST request using ZAP and try changing the ip parameter to the following command:
;cat flag.txt;
or additionally if this command is giving you a connection timeout, you can try the following other command:
;head flag.txt;
/GEOL-101/Visual%20Aids/Pasted%20image%2020250926162230.png)
flag: HTB{1n73rc3p73d_1n_7h3_m1ddl3}
Note:
- For copy and pasting between guest VM in MacOS UTM:
- For Linux guests like Kali Linux, install the
spice-vdagentpackage within the guest OS by runningsudo apt install spice-vdagent, followed by a restart of the virtual machine. Additionally, ensure that clipboard sharing is enabled in the UTM settings under the Sharing section.
- For Linux guests like Kali Linux, install the