Proxy Setup
Overview
We can set up these tools as a proxy for any application, such that all web requests would be routed through them so that we can manually examine what web requests an application is sending and receiving. This will enable us to understand better what the application is doing in the background and allows us to intercept and change these requests or reuse them with various changes to see how the application responds.
Pre-Configured Browser
To use the tools as web proxies, we must configure our browser proxy settings to use them as the proxy or use the pre-configured browser. Both tools have a pre-configured browser that comes with pre-configured proxy settings and the CA certificates pre-installed, making starting a web penetration test very quick and easy.
In Burp's (Proxy>Intercept), we can click on Open Browser, which will open Burp's pre-configured browser, and automatically route all web traffic through Burp:

In ZAP, we can click on the Firefox browser icon at the end of the top bar, and it will open the pre-configured browser:

Proxy Setup
In many cases, we may want to use a real browser for pentesting, like Firefox. To use Firefox with our web proxy tools, we must first configure it to use them as the proxy. We can manually go to Firefox preferences and set up the proxy to use the web proxy listening port. Both Burp and ZAP use port 8080 by default, but we can use any available port. If we choose a port that is in use, the proxy will fail to start, and we will receive an error message.
Note: In case we wanted to serve the web proxy on a different port, we can do that in Burp under (Proxy>Options), or in ZAP under (Tools>Options>Local Proxies). In both cases, we must ensure that the proxy configured in Firefox uses the same port.
Instead of manually switching the proxy, we can utilize the Firefox extension Foxy Proxy to easily and quickly change the Firefox proxy. Can be installed to your own Firefox browser by visiting the Firefox Extensions Page and clicking Add to Firefox to install it.
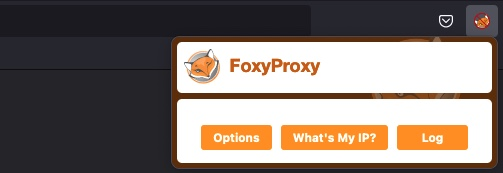
Once we have the extension added, we can configure the web proxy on it by clicking on its icon on Firefox top bar and then choosing options:
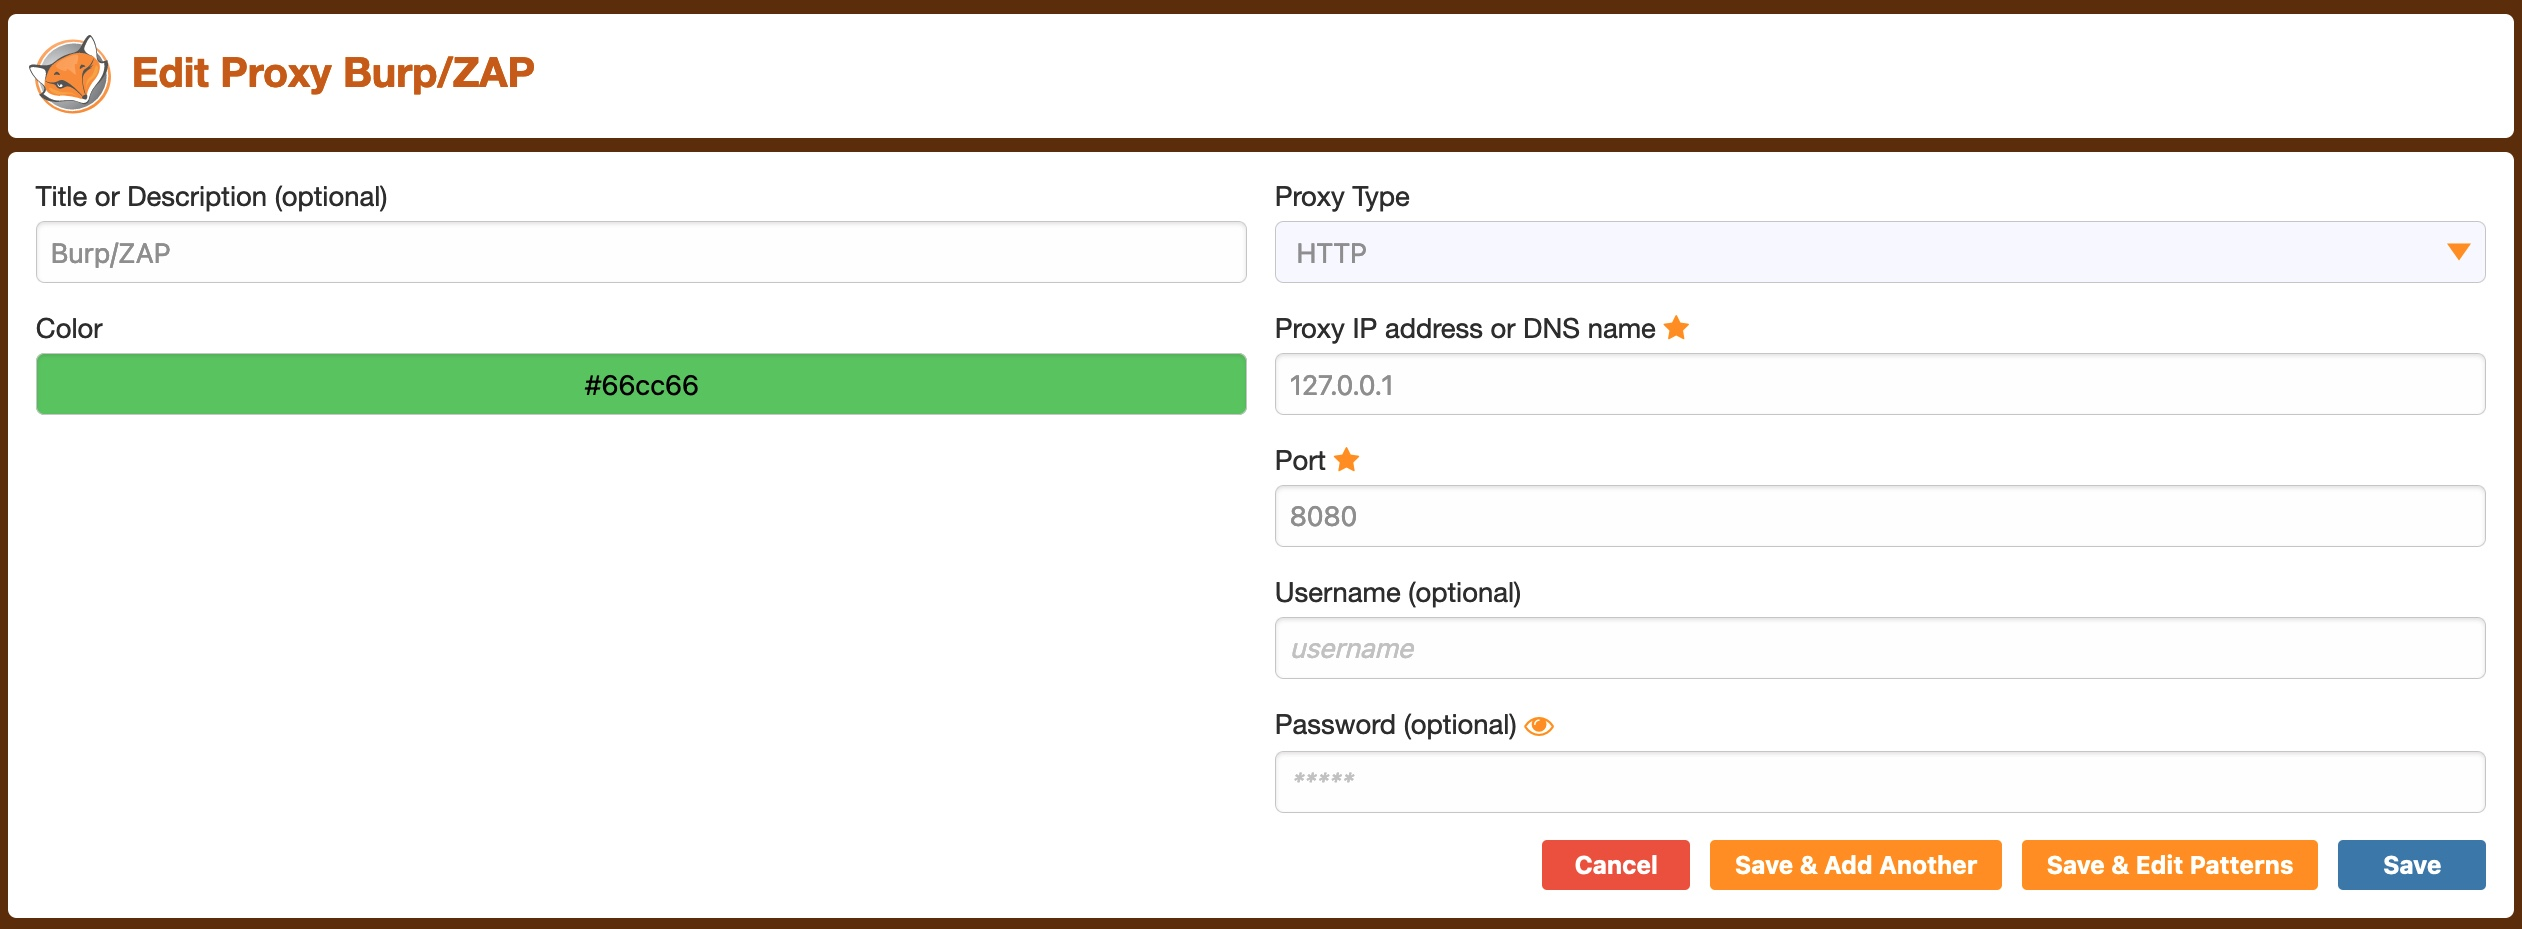
Once we're on the options page, we can click on add on the left pane, and then use 127.0.0.1 as the IP, and 8080 as the port, and name it Burp or ZAP:
Finally, we can click on the Foxy Proxy icon and select Burp/ZAP. To start using the proxy.
Installing CA Certificate
Another important step when using Burp Proxy/ZAP with our browser is to install the web proxy's CA Certificates. If we don't do this step, some HTTPS traffic may not get properly routed, or we may need to click accept every time Firefox needs to send an HTTPS request.
We can install Burp's certificate once we select Burp as our proxy in Foxy Proxy, by browsing to http://burp, and download the certificate from there by clicking on CA Certificate:

To get ZAP's certificate, we can go to (Tools>Options>Network>Server Certificates), then click on Save:
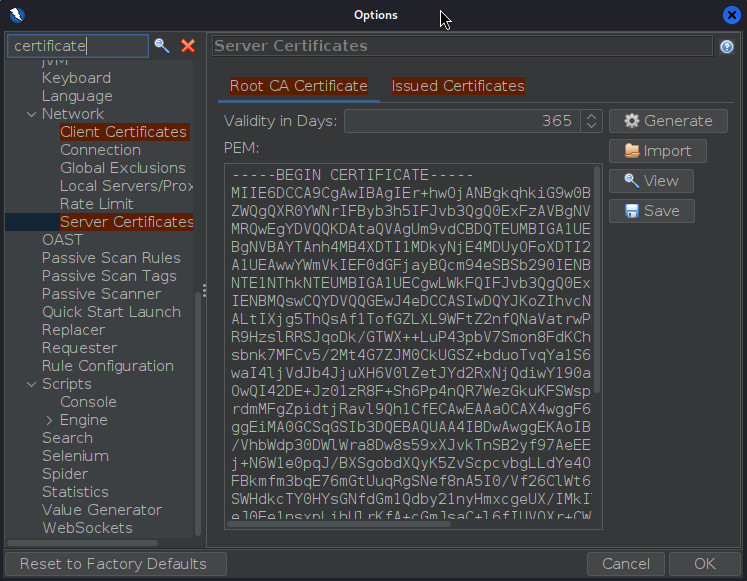
We can also change our certificate by generating a new one with the Generate button.
Once we have our certificates, we can install them within Firefox by browsing to about:preferences#privacy, scrolling to the bottom, and clicking View Certificates:
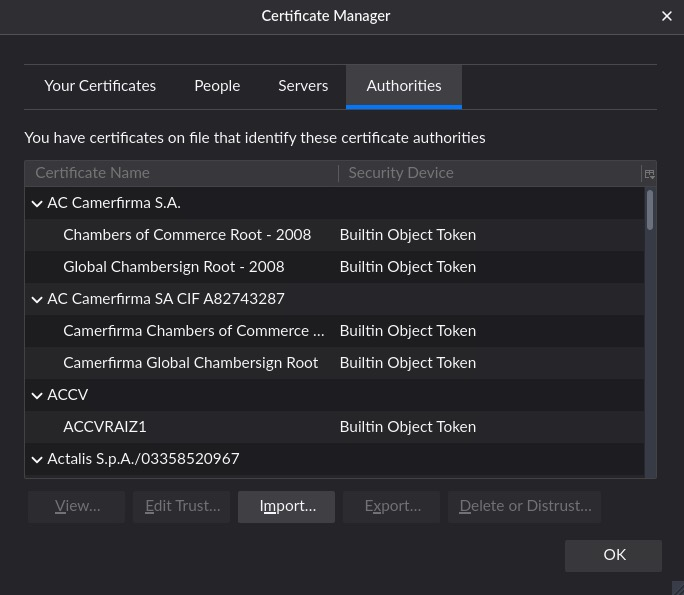
After that, we can select the Authorities tab, and then click on import, and select the downloaded CA certificate:
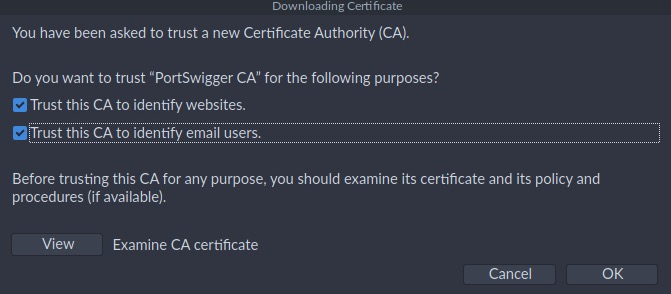
Finally, we must select Trust this CA to identify websites and Trust this CA to identify email users, and then click OK:
Once we install the certificate and configure the Firefox proxy, all Firefox web traffic will start routing through our web proxy.